Analysis
See what each camera can actually make out.
Where a camera can detect, observe, recognise or identify. Views stop at the walls, a pixel-density map grades every spot per EN 62676-4, and the recorder is sized for the retention you set.
place and aim
Views that stop at the walls.
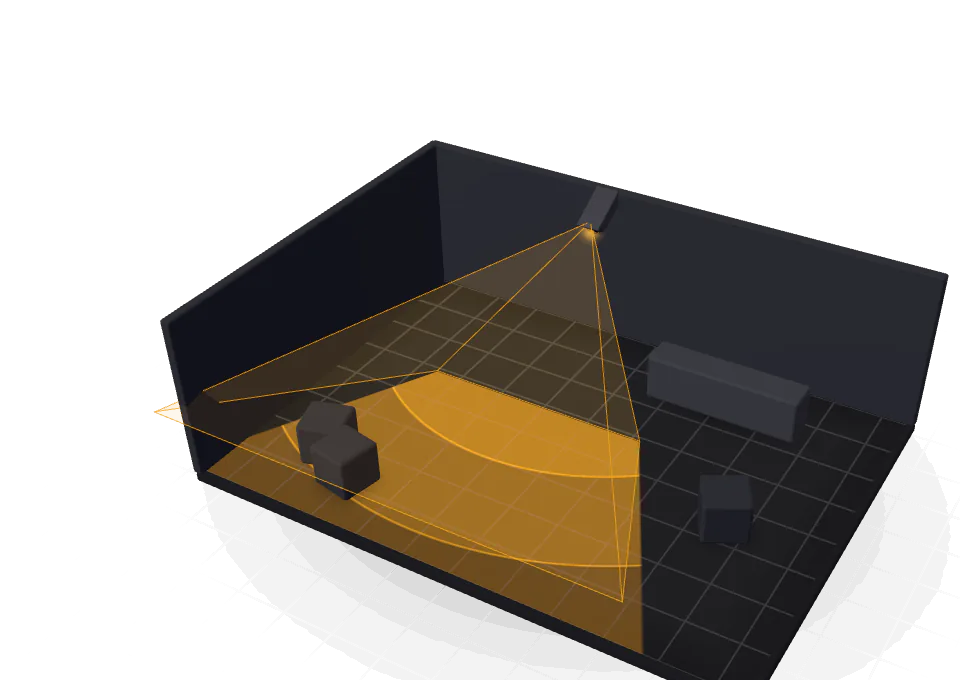
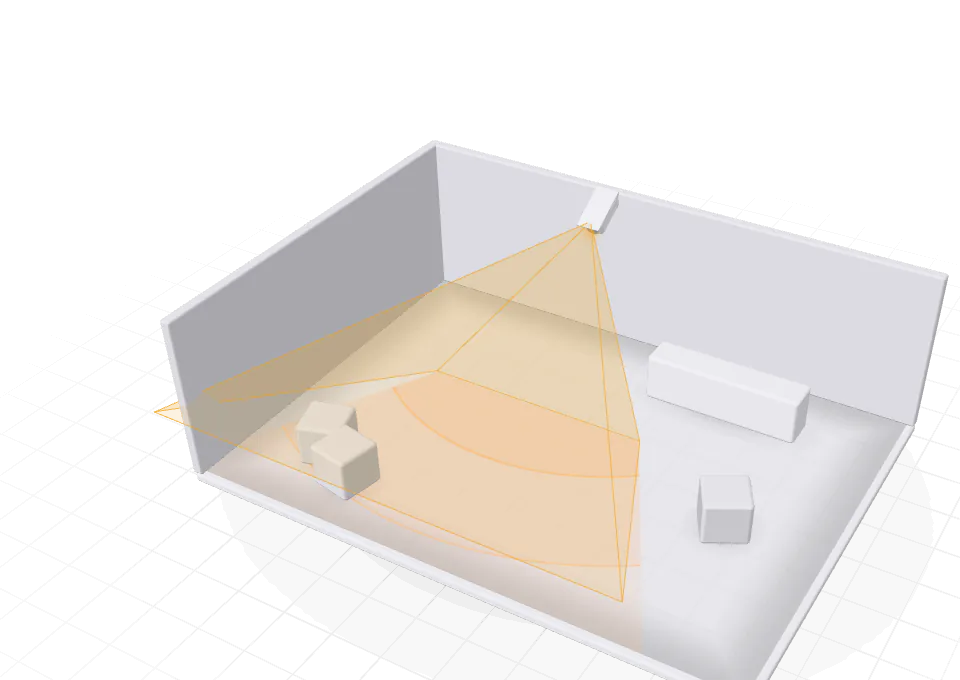
Switch to the CCTV module, pick a camera from the library and click where it mounts. Drag anywhere in the coverage cone to aim it, and choose a ceiling or wall mount per camera: a wall camera snaps flush to the nearest wall and looks into the room. Every view is clipped by the walls, so no camera appears to see through them.
Auto-place covers each area to the target grade with as few cameras as possible; re-aim them to taste. In 3D, every camera and its footprint stand in the room: the quickest way to check mounting heights and the blind spot under each camera.
DORI
Pixels per metre, graded per EN 62676-4.
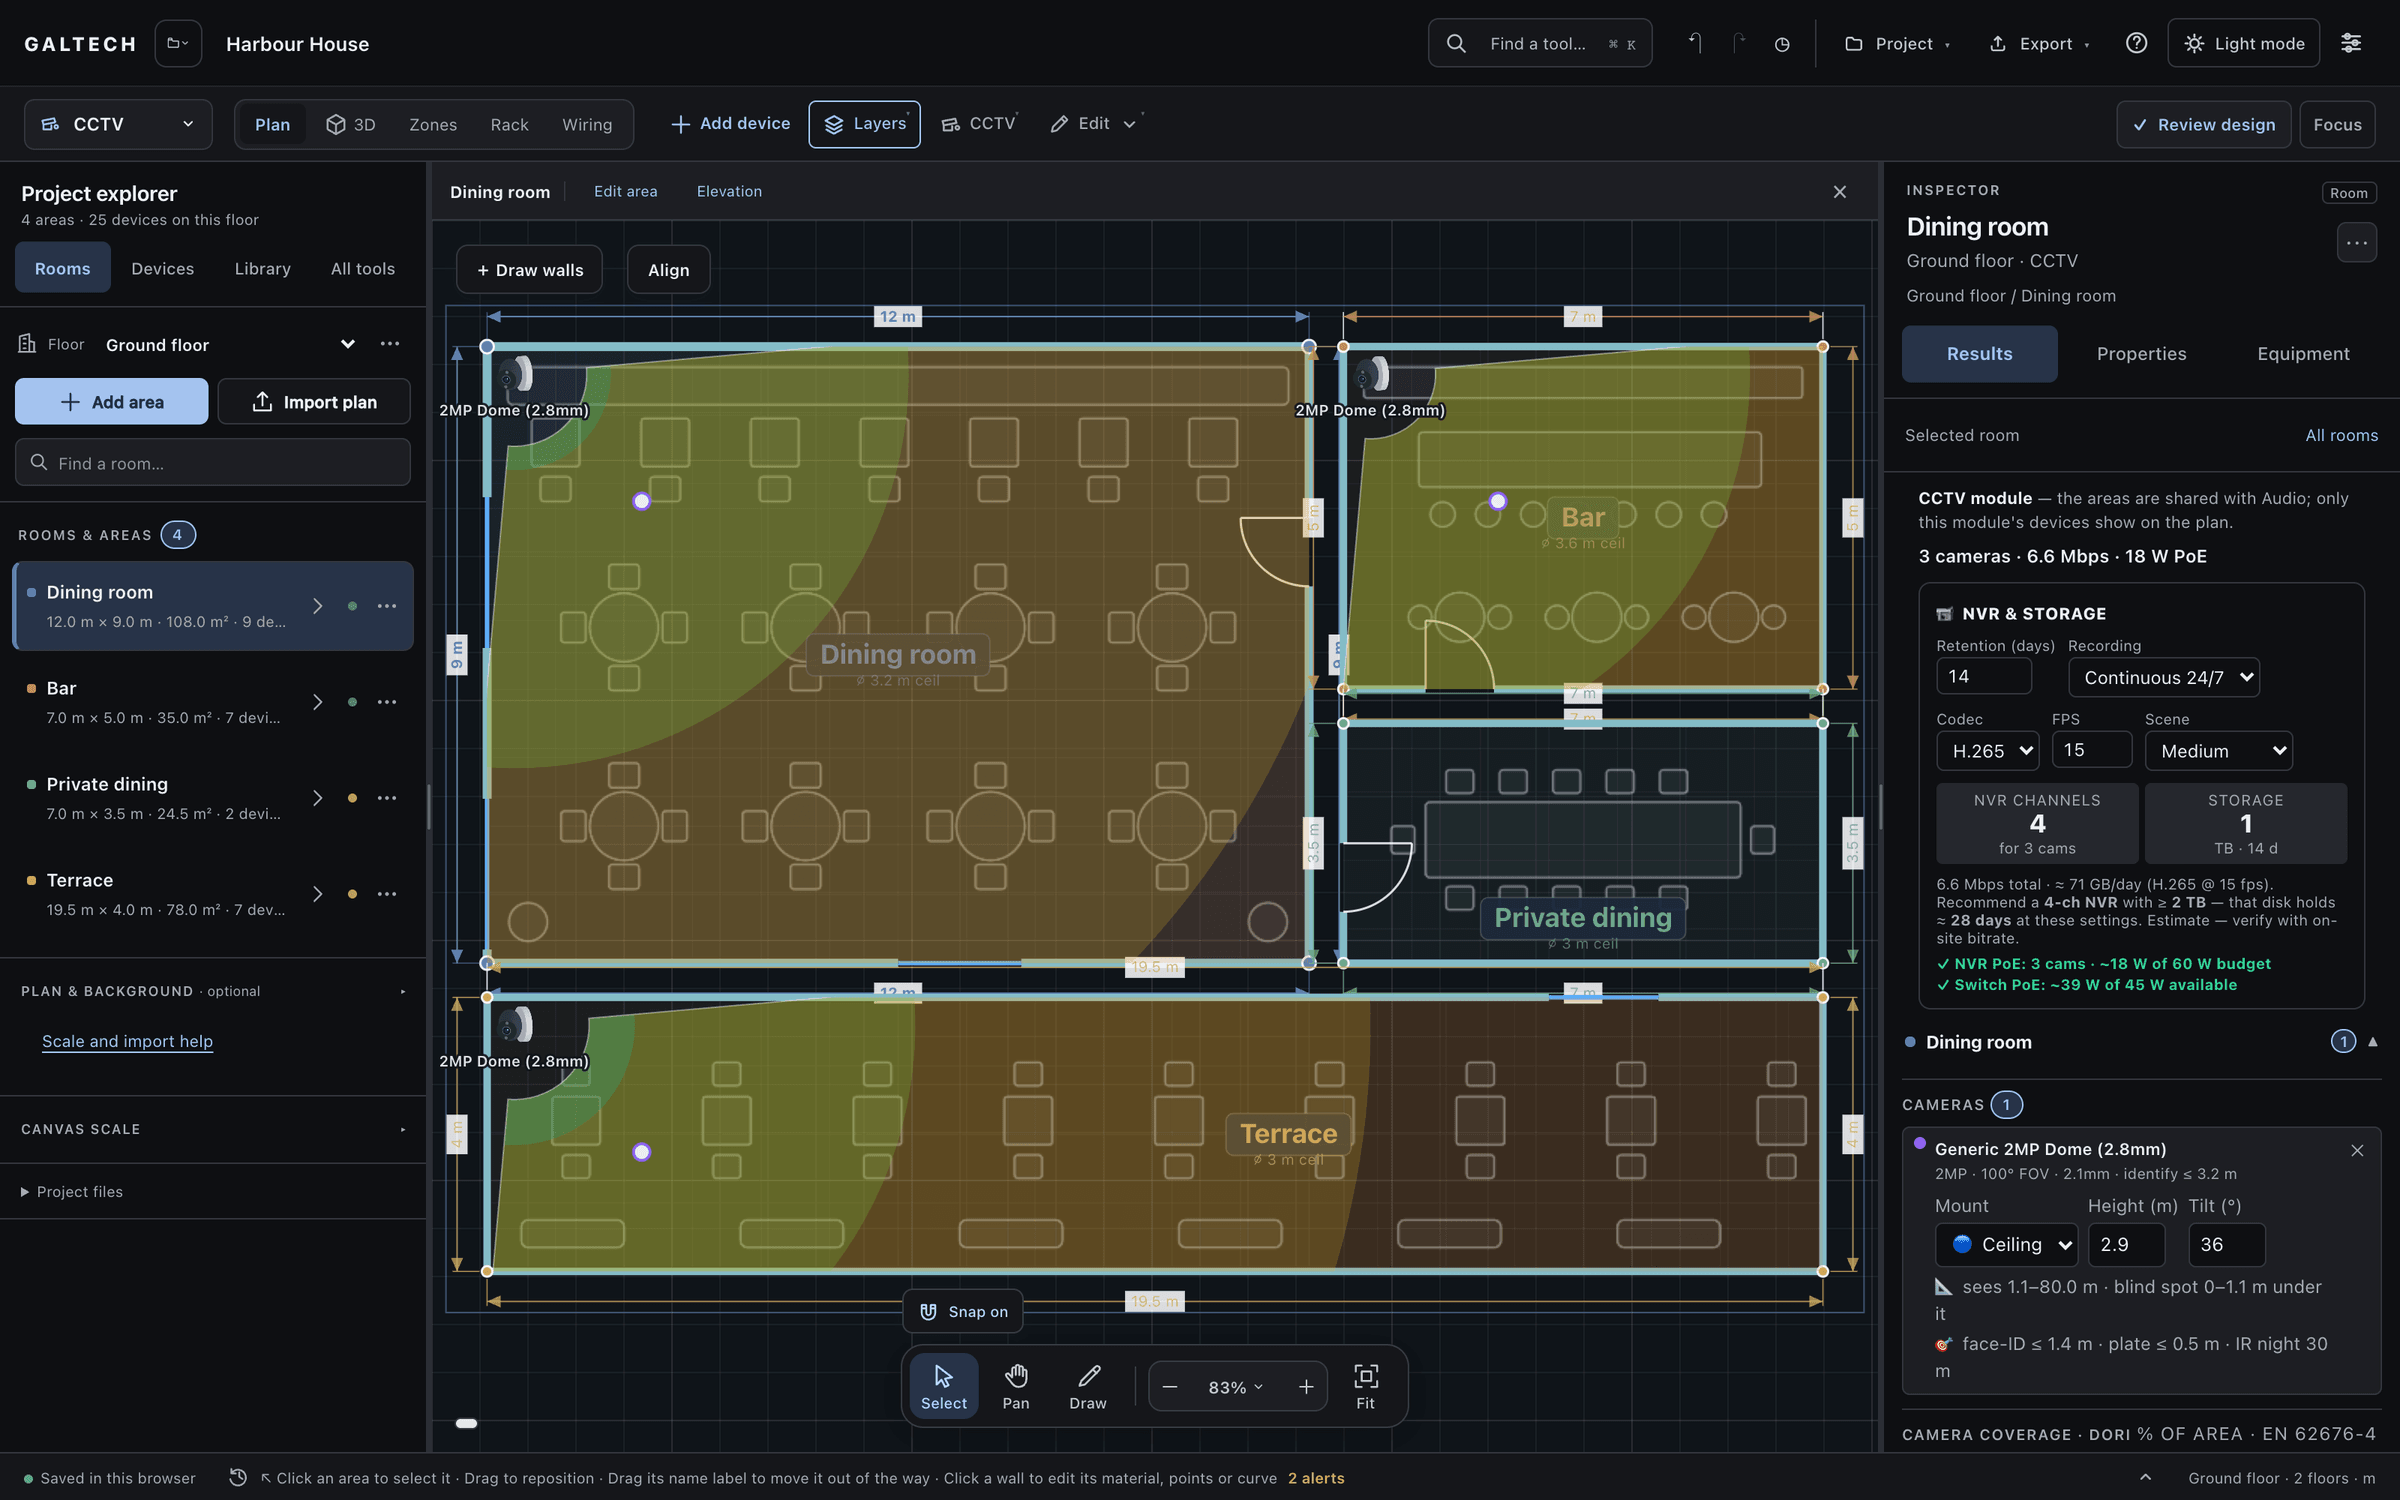
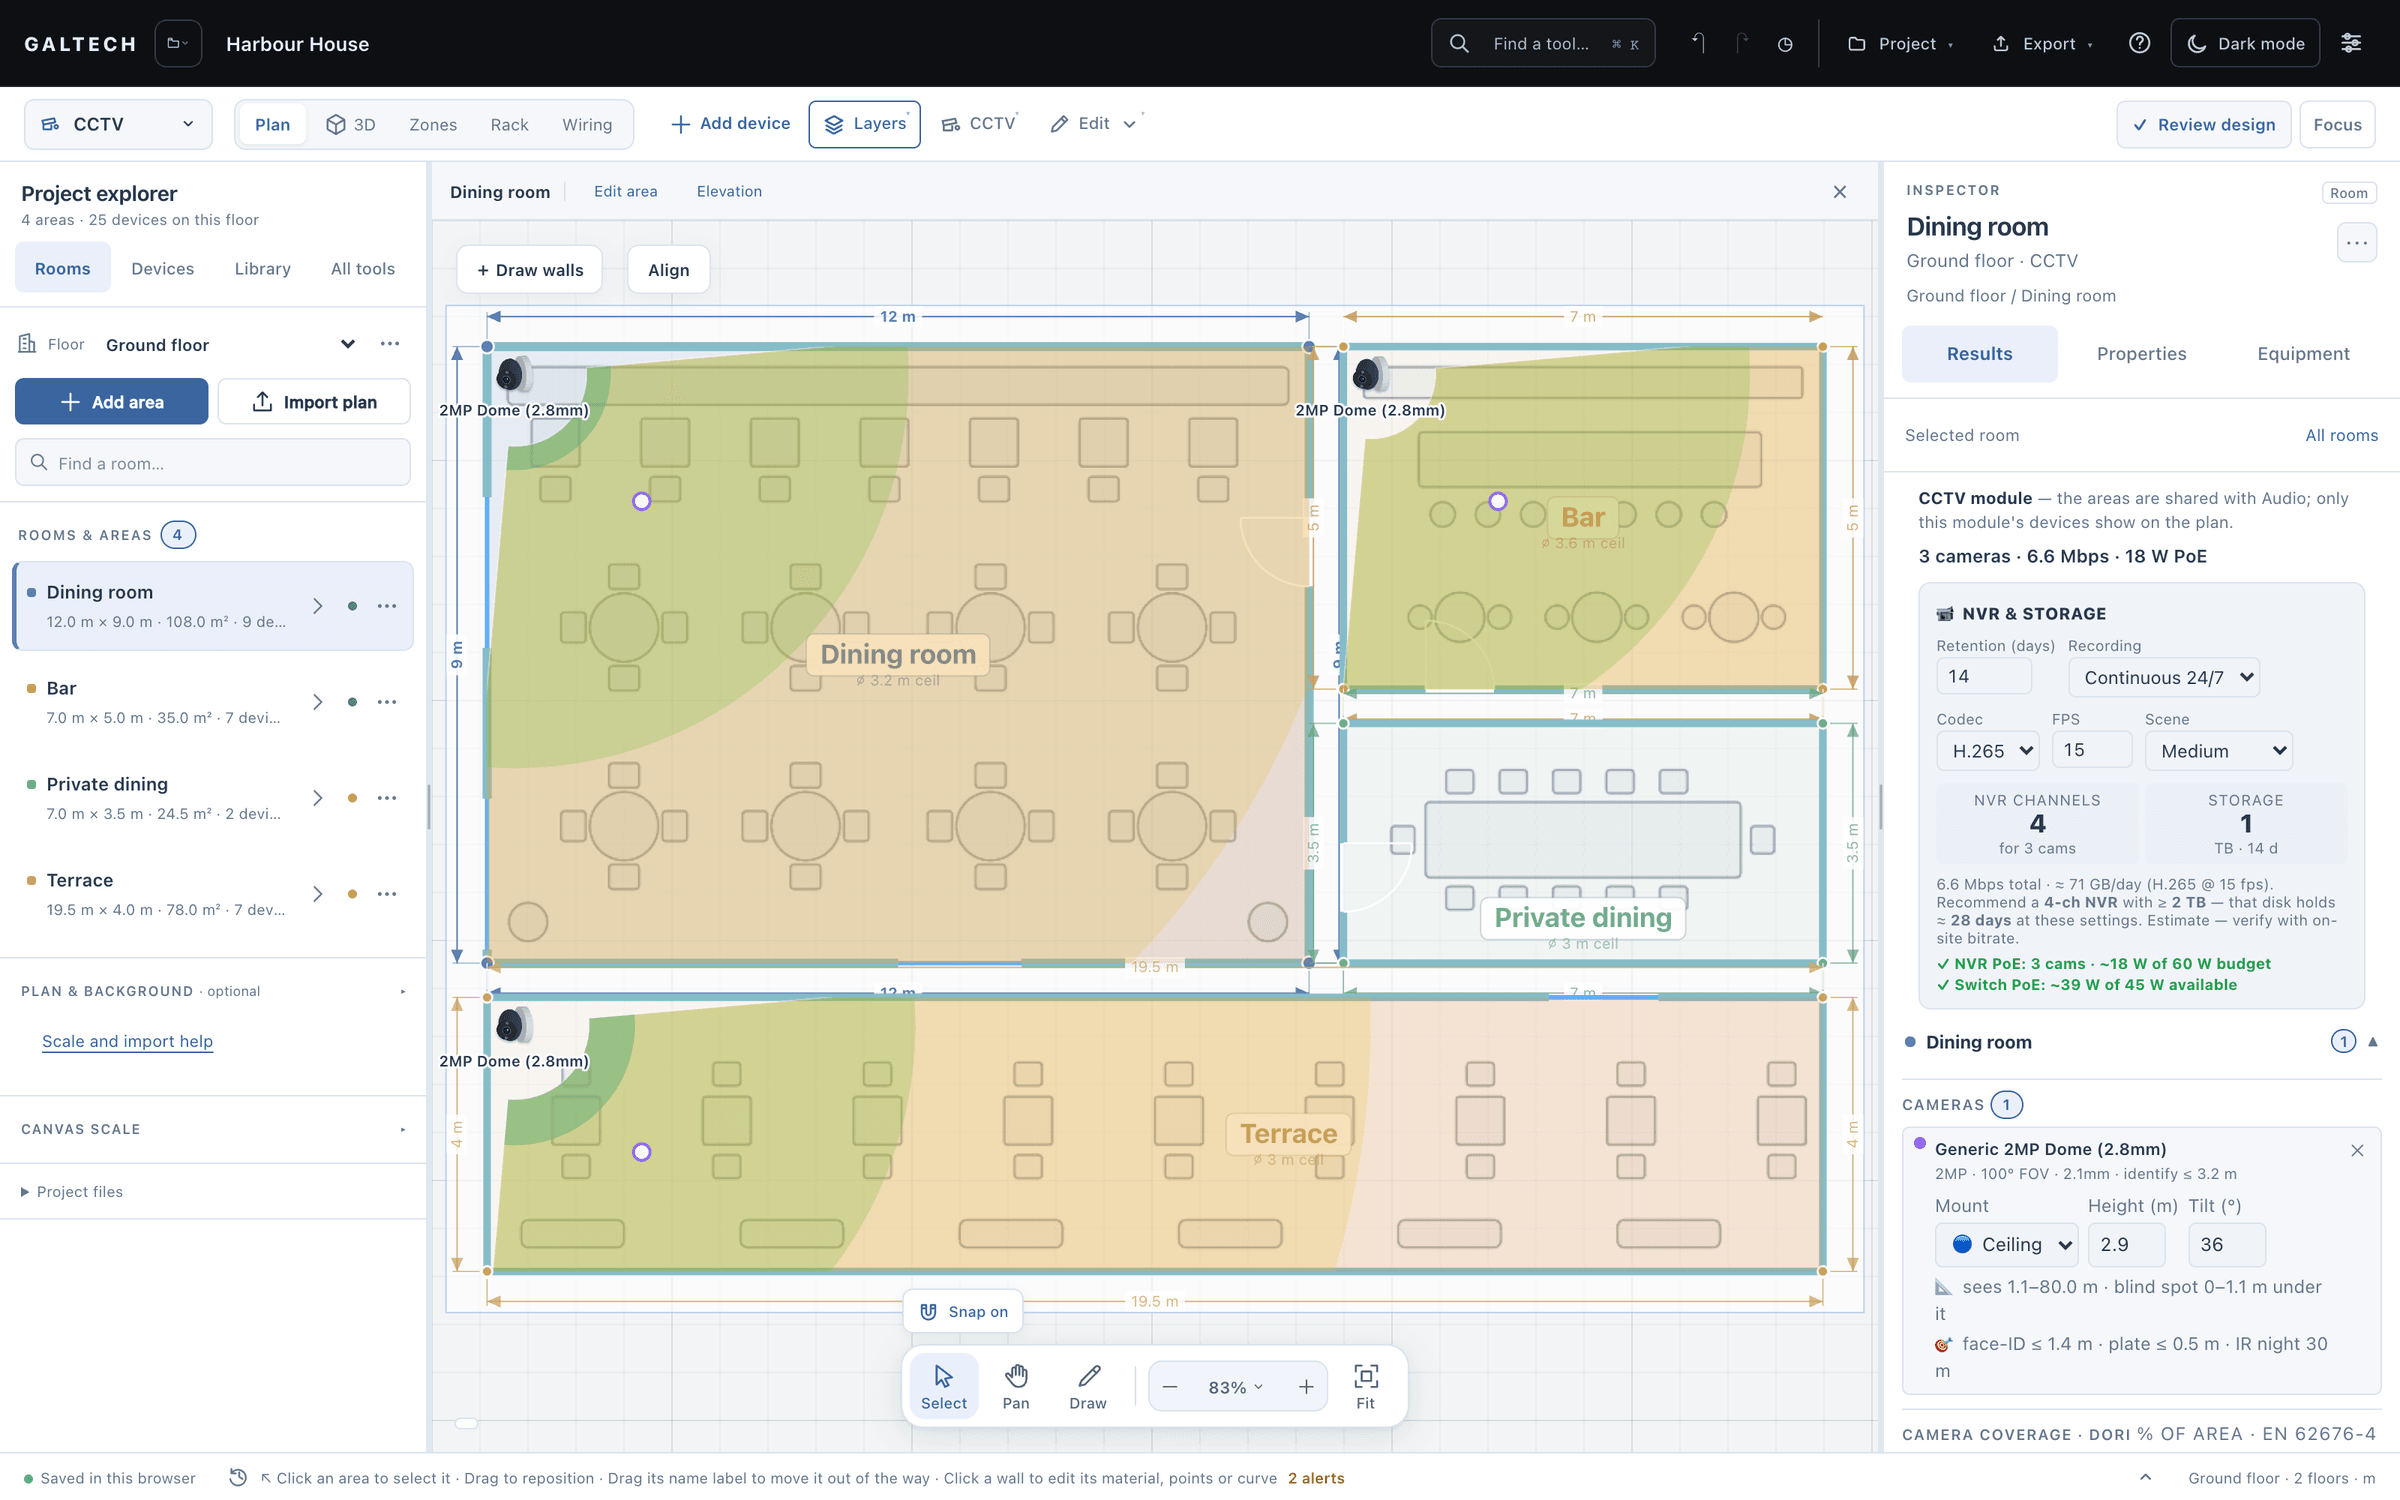
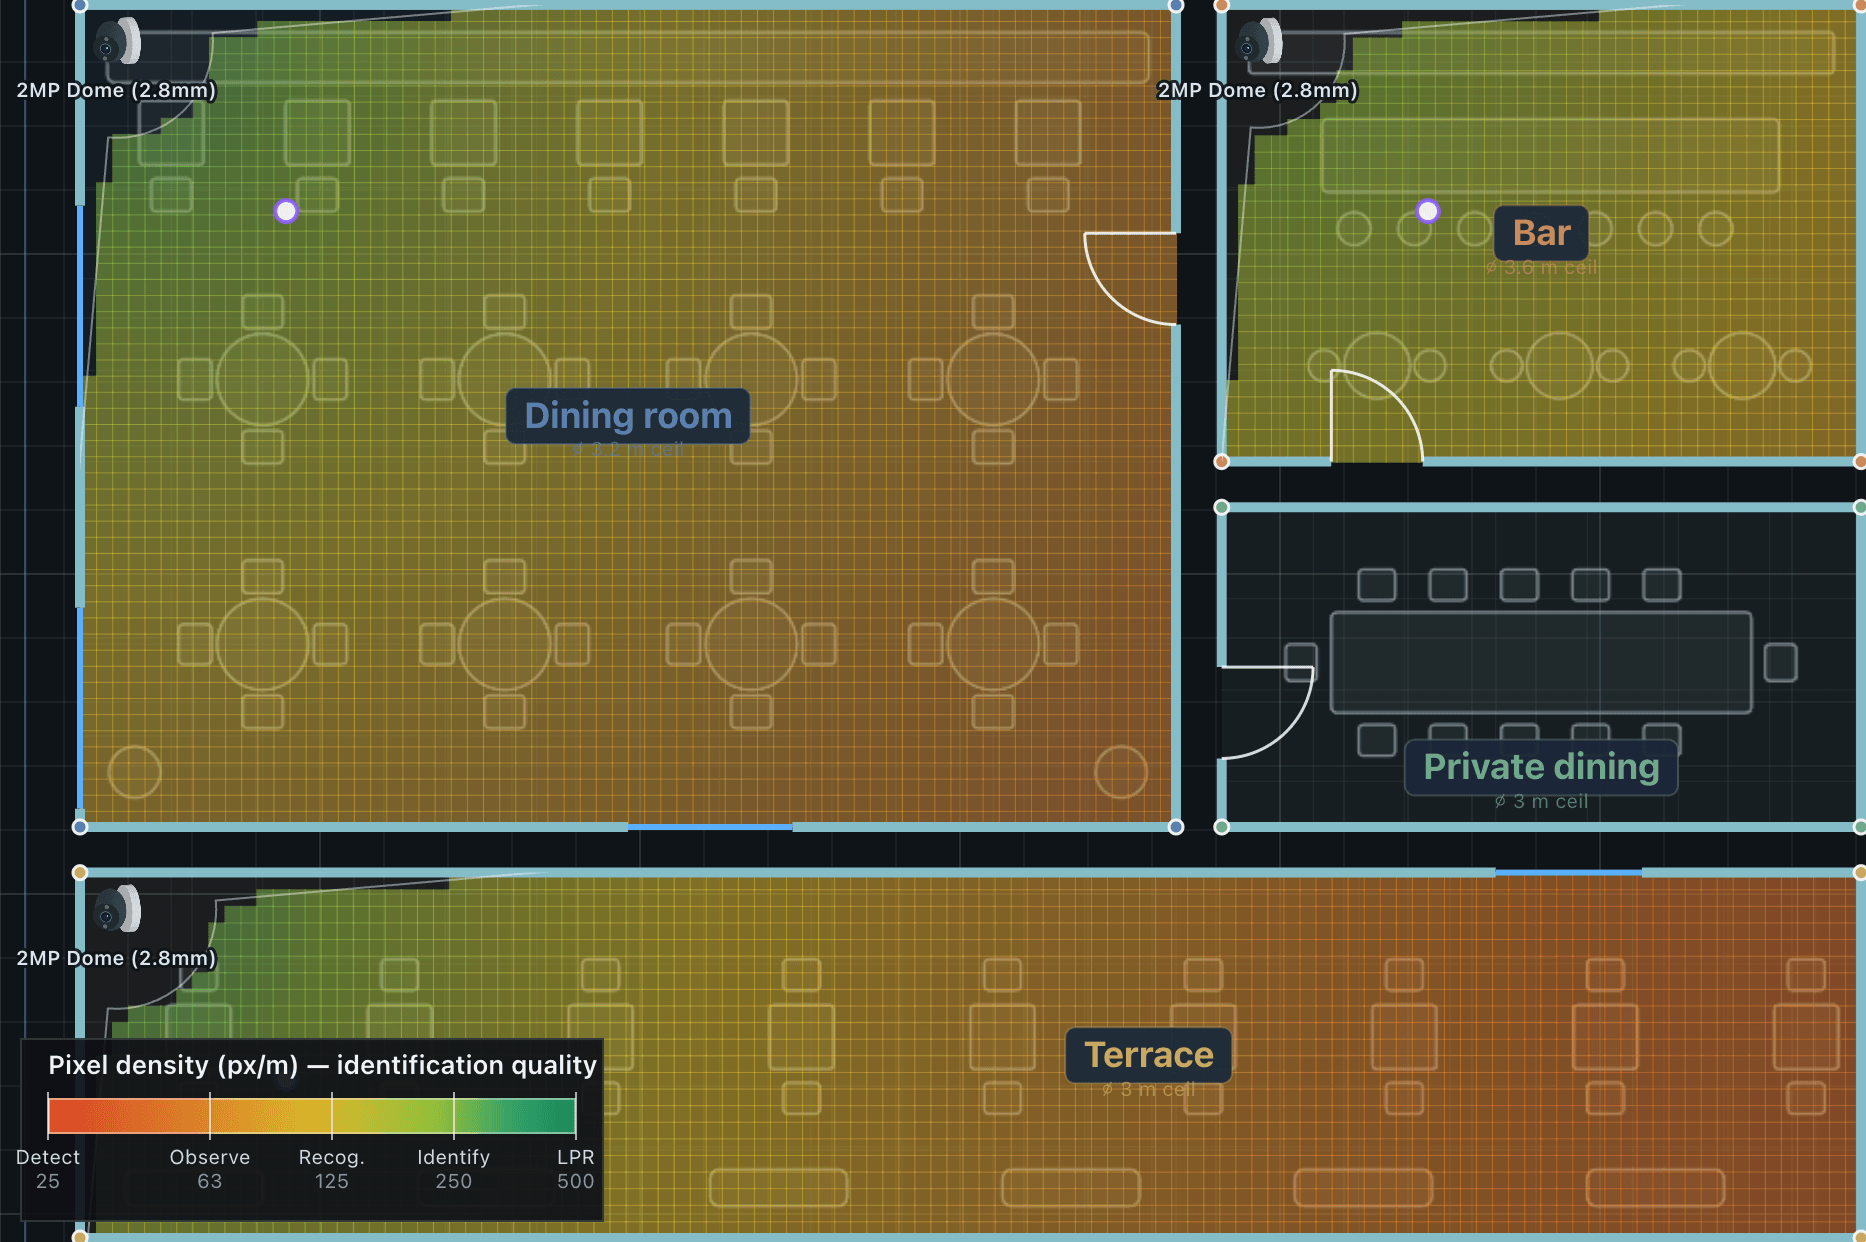
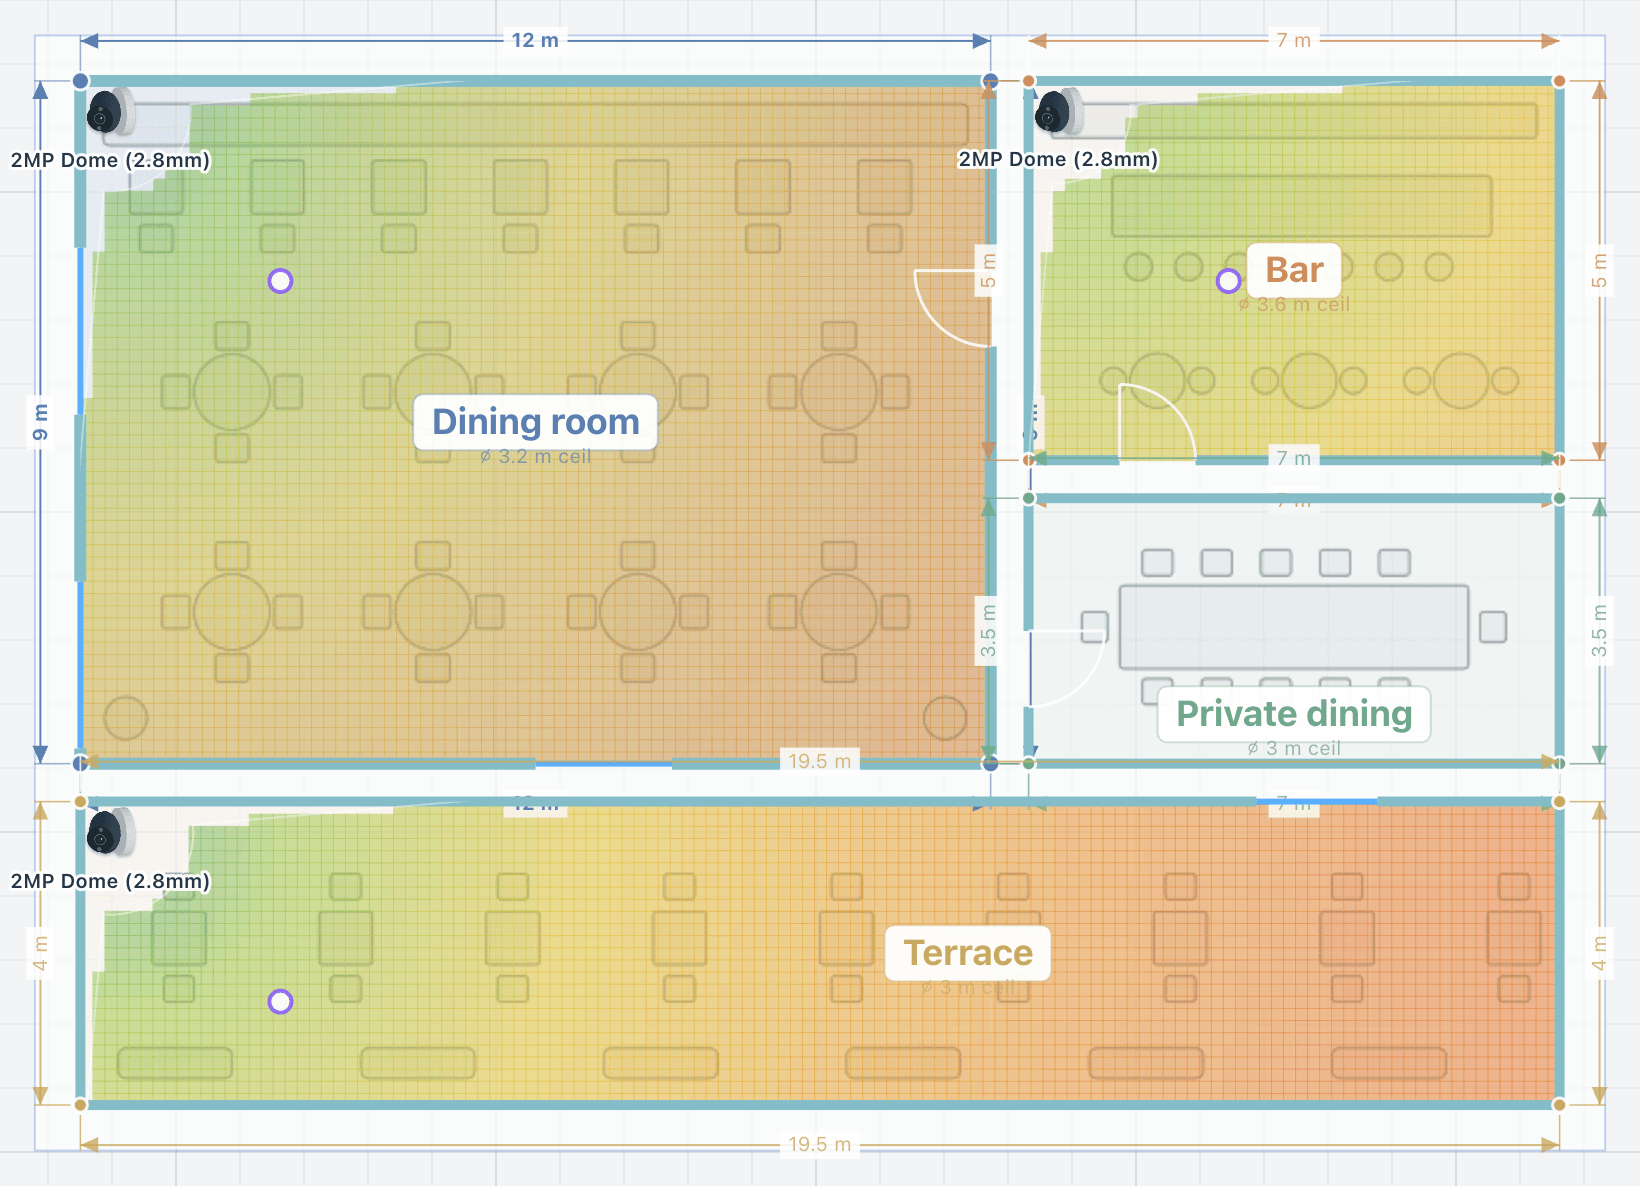
A field of view says what a camera can see; its pixel density says what an operator can make out. The cone is shaded by DORI grade from the camera’s resolution and lens, and the pixel-density map shows the detail everywhere: green where a face can be identified, through yellow to red where a person can only be detected.
Each grade needs a horizontal pixel density, and the distance at which a camera reaches it follows from its horizontal resolution and its field of view. A wider lens covers more, and reaches each grade sooner.
Draw a coverage zone over a critical spot (a door, a till, a gate), set the grade it must meet, and the tool flags any gap in red. The lens calculator converts focal length, field of view and pixel density at a distance for any sensor: the quick answer to whether 4 mm will identify a face at the gate.
| What an operator can do with a person in view | |
|---|---|
| Identify | 250 px/m |
| Recognise | 125 px/m |
| Observe | 63 px/m |
| Detect | 25 px/m |
| A coverage zone can also ask for | |
| Plate (LPR) | 400 px/m |
how it works
Check the detail, not only the field of view.
Place and aim CCTV camerasTask guide 09 · 3 min
Choose a camera
Choose CCTV → Library, search for a model and open Details. Review resolution, lens and field of view before choosing the device.
Aim and check image detail
In CCTV tools, enable Show FOV / DORI coverage. Drag the camera’s circular aiming handle to turn it, then press Escape to finish. Enable Show pixel-density map to check the required detail at entrances and other critical positions.
Review recording requirements
Use Results for coverage, recording mode, retention, codec and frame-rate settings. Use Equipment to inspect the proposed cameras, recorder and network devices, then check recording channels, storage and PoE capacity.
Keep in mind
A location inside the field of view may still lack sufficient image detail. Check the indicated pixel density or DORI grade at the required distance.
Lesson 04 · 8:39Network, CCTV, video and automation
The whole lessonthe map
Detail you can read off the floor.
The pixel-density map paints the whole plan, so the gaps between cameras and the far ends of a long room are plain to see before anything is bought.
recorder and storage
The recorder, sized for the retention.
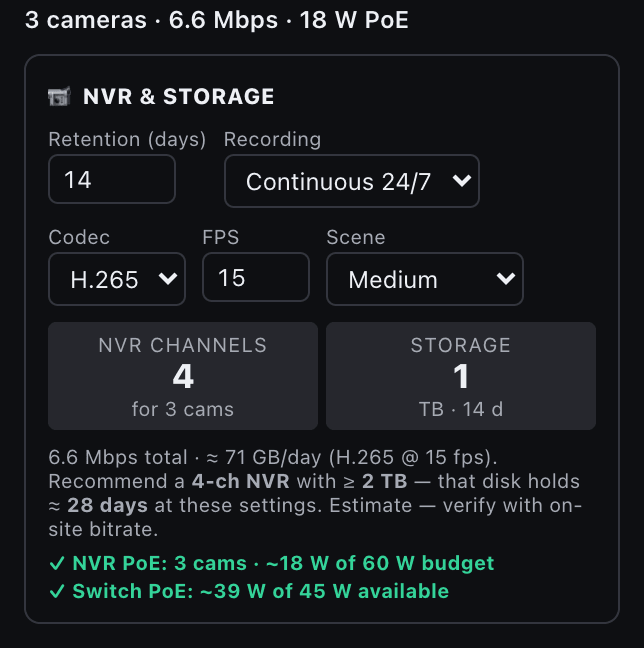
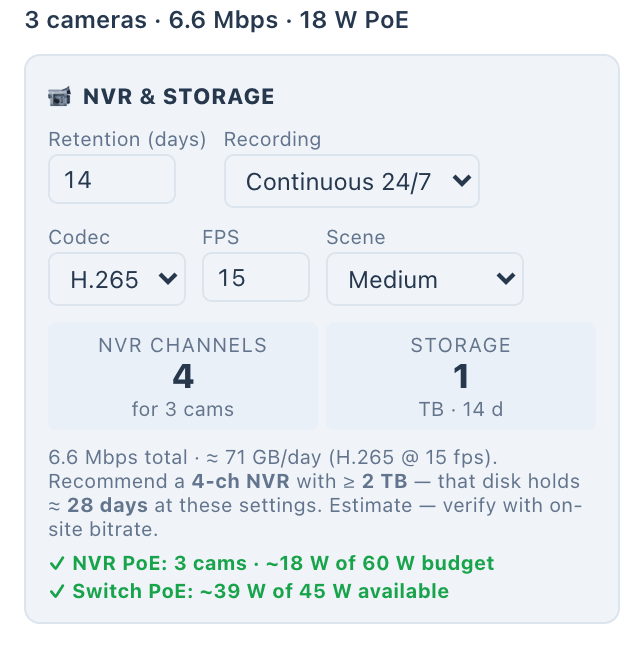
The results panel picks the NVR, checking its channels and PoE budget against your cameras, and sizes the disks from the retention in days, the resolution, the frame rate, the codec and the recording mode, continuous or on motion. The recorder serves the whole building, so it is sized for the cameras on every floor.
The card shows the total bitrate, the gigabytes a day and the recommended disk, then a PoE audit: what the cameras draw from the NVR’s budget and what the switch supplies. Treat the bitrate as an estimate and check it against the cameras on site.
Cameras and the recorder are priced lines in the proposal, as a CCTV group, and Camera and NVR rows in the bill of materials. Add your own camera from its datasheet (megapixels, sensor, lens or field of view, IR range, PoE draw) and it behaves like a built-in one.
in figures
CCTV, in figures.
- cameras in the catalogue
- 34
- NVRs in the catalogue
- 12
- to identify a face
- 250 px/m
- retention sized in the demo
- 14 days
| Retention | Days to keep; 14 in the demo |
|---|---|
| Recording | Continuous or on motion |
| Codec | H.265 or H.264 |
| Frame rate | Frames per second; 15 in the demo |
| Scene | Low, medium or high activity |
| Out | NVR channels, storage, gigabytes a day and a PoE audit |
questions
Questions, answered plainly.
Is a camera that sees the door enough to identify who comes in?
Not always. A spot inside the field of view may still lack the detail you need. Check the pixel density or the DORI grade at the distance that matters, or draw a coverage zone there with the grade it must meet.
Is the DORI map a test of the installed camera?
No. It predicts pixel density from the camera’s resolution, lens and position, graded per EN 62676-4, to plan with. Confirm the image on site.
Can I add a camera that is not in the library?
Yes. Add your own camera model with its megapixels, sensor, lens or field of view, IR range and PoE draw; it is kept across every project and works like a built-in one, in DORI, schedules, the rack, wiring and reports. Recorders work the same way.
Ready when the client is.
Draw it, check it, show it, price it and hand it over, from one project.
15-day trial for approved companies. No card, nothing to cancel.