Audio
Organise zones, sources and paging
Every area starts as its own zone. Set each zone’s source and level, group areas into custom zones, flag paging, and place the shared audio equipment.
On this page
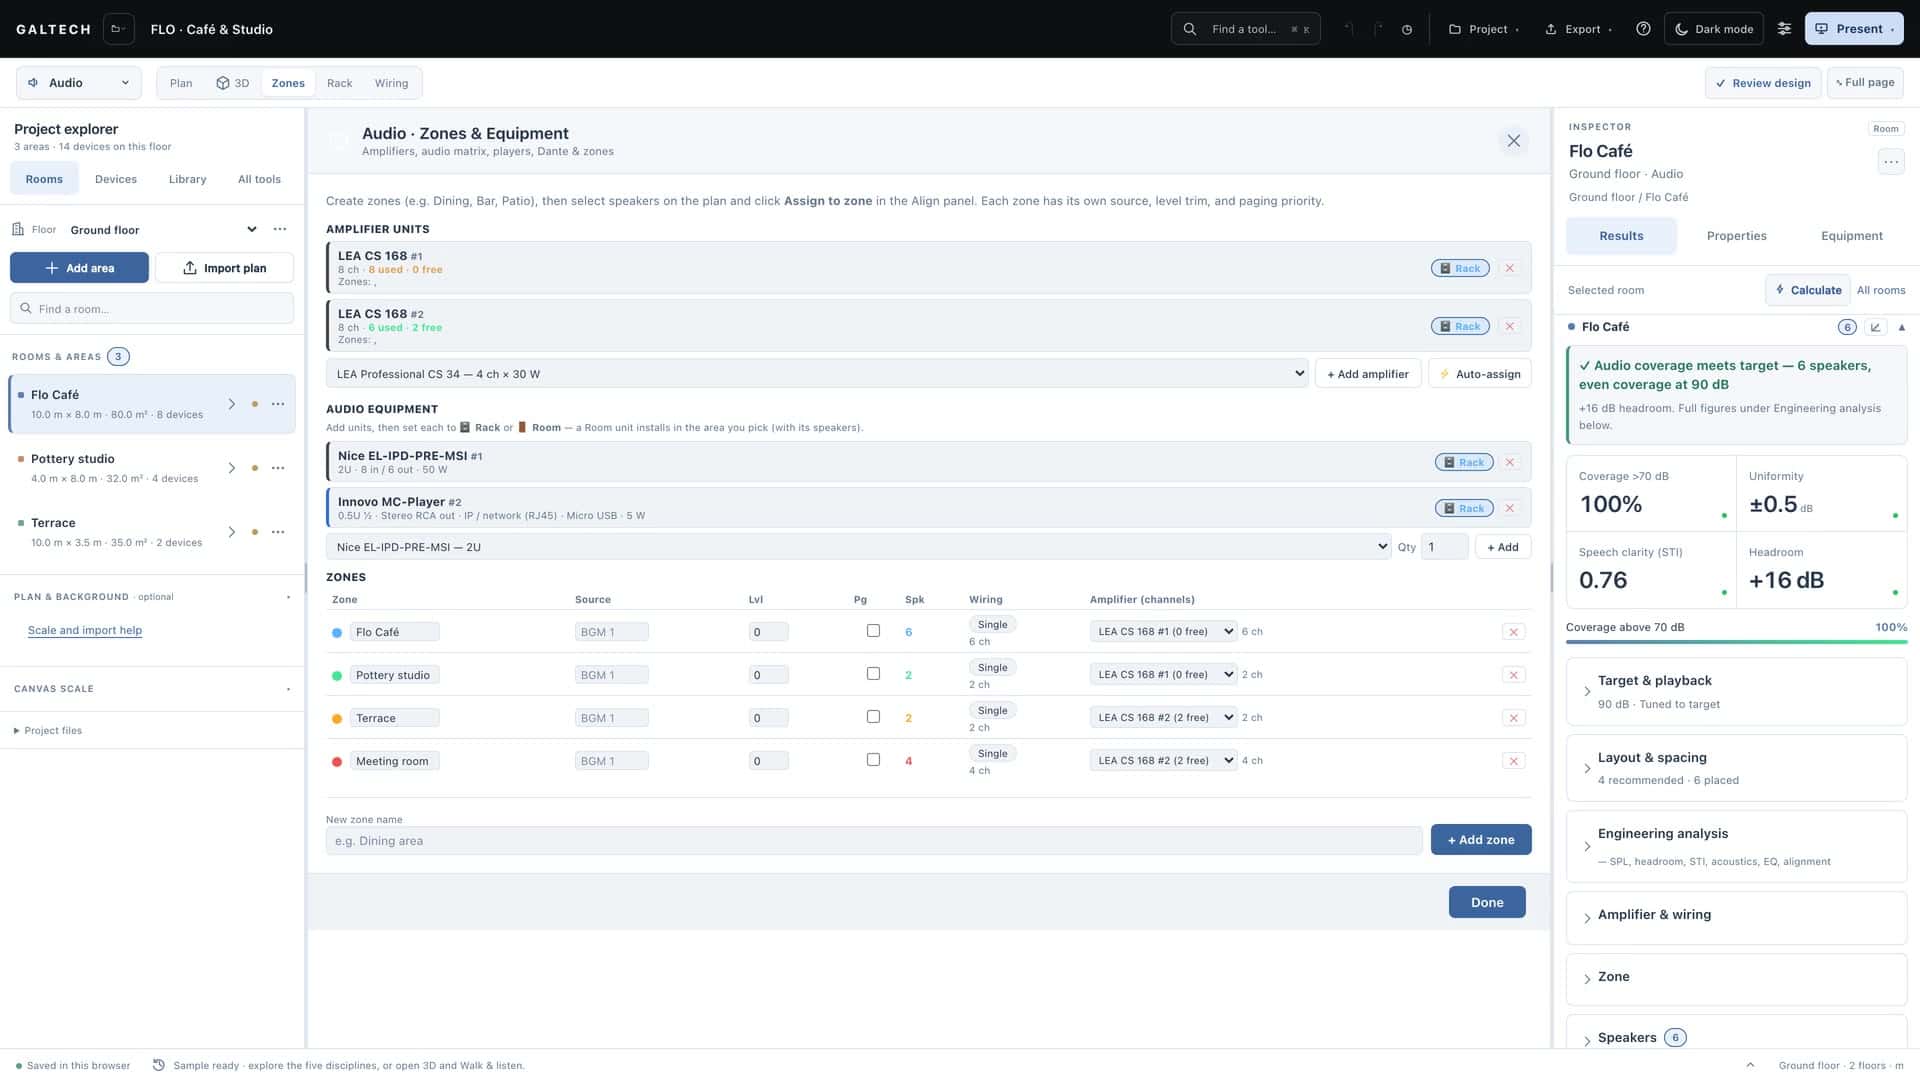
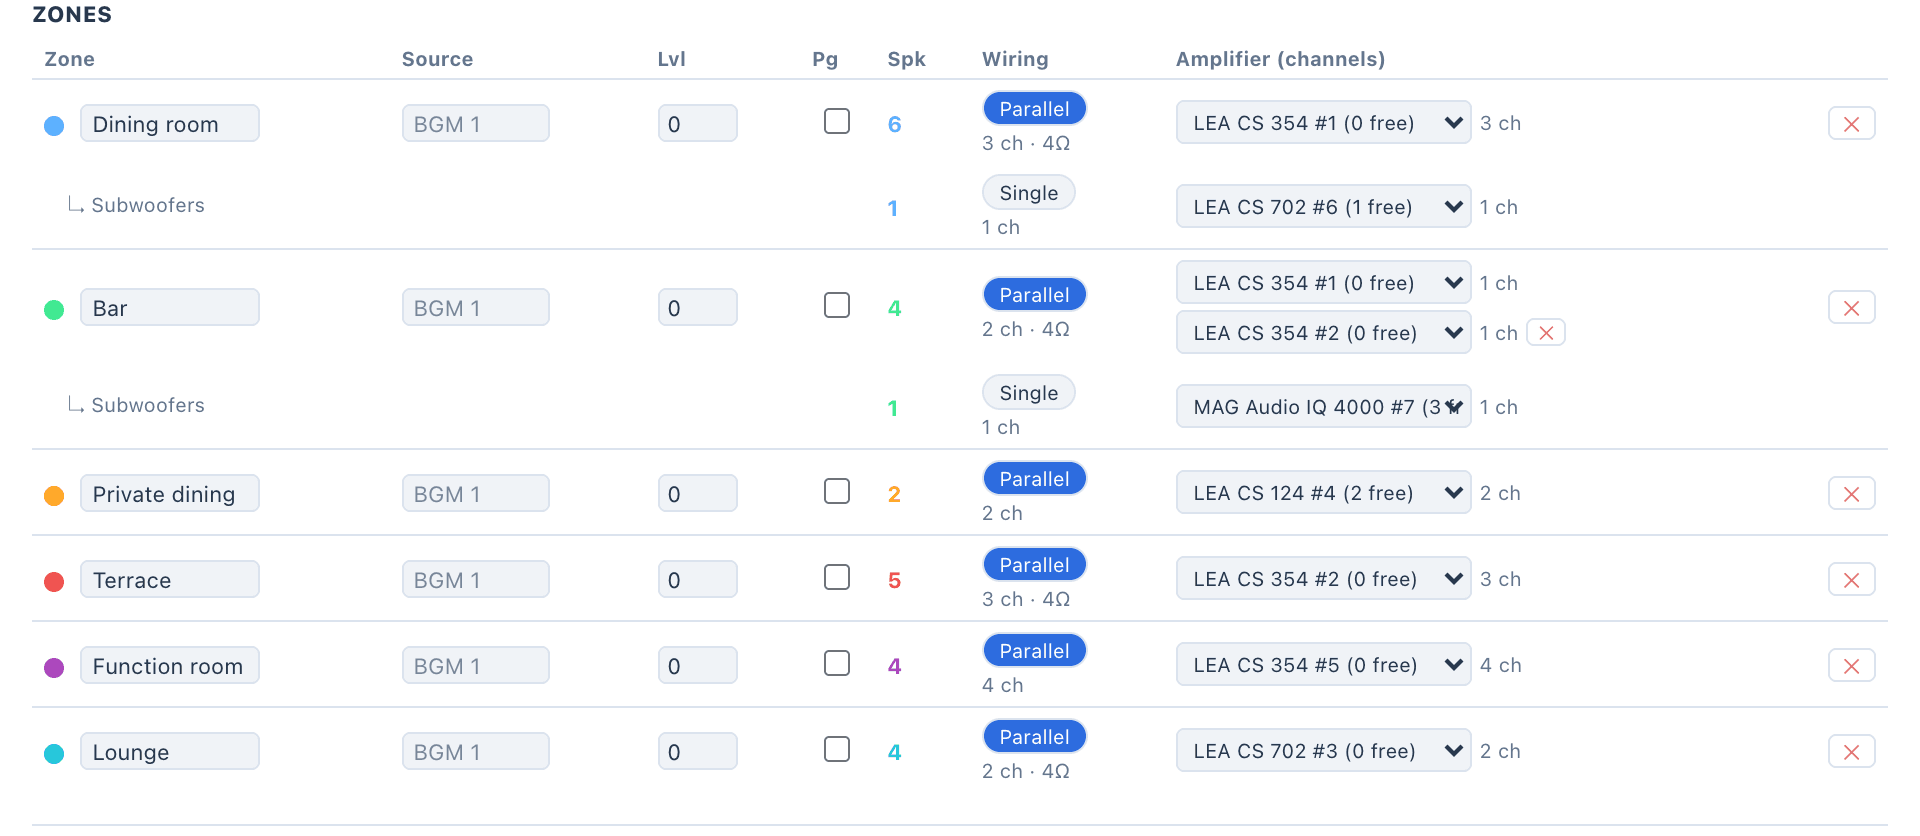
The Zones view answers one question: what plays where, and from which amplifier channel. Every area becomes a zone of its own, named after it, with its speakers assigned. You set the source, the level and the wiring, and group areas when they should play together.
Set up the zones
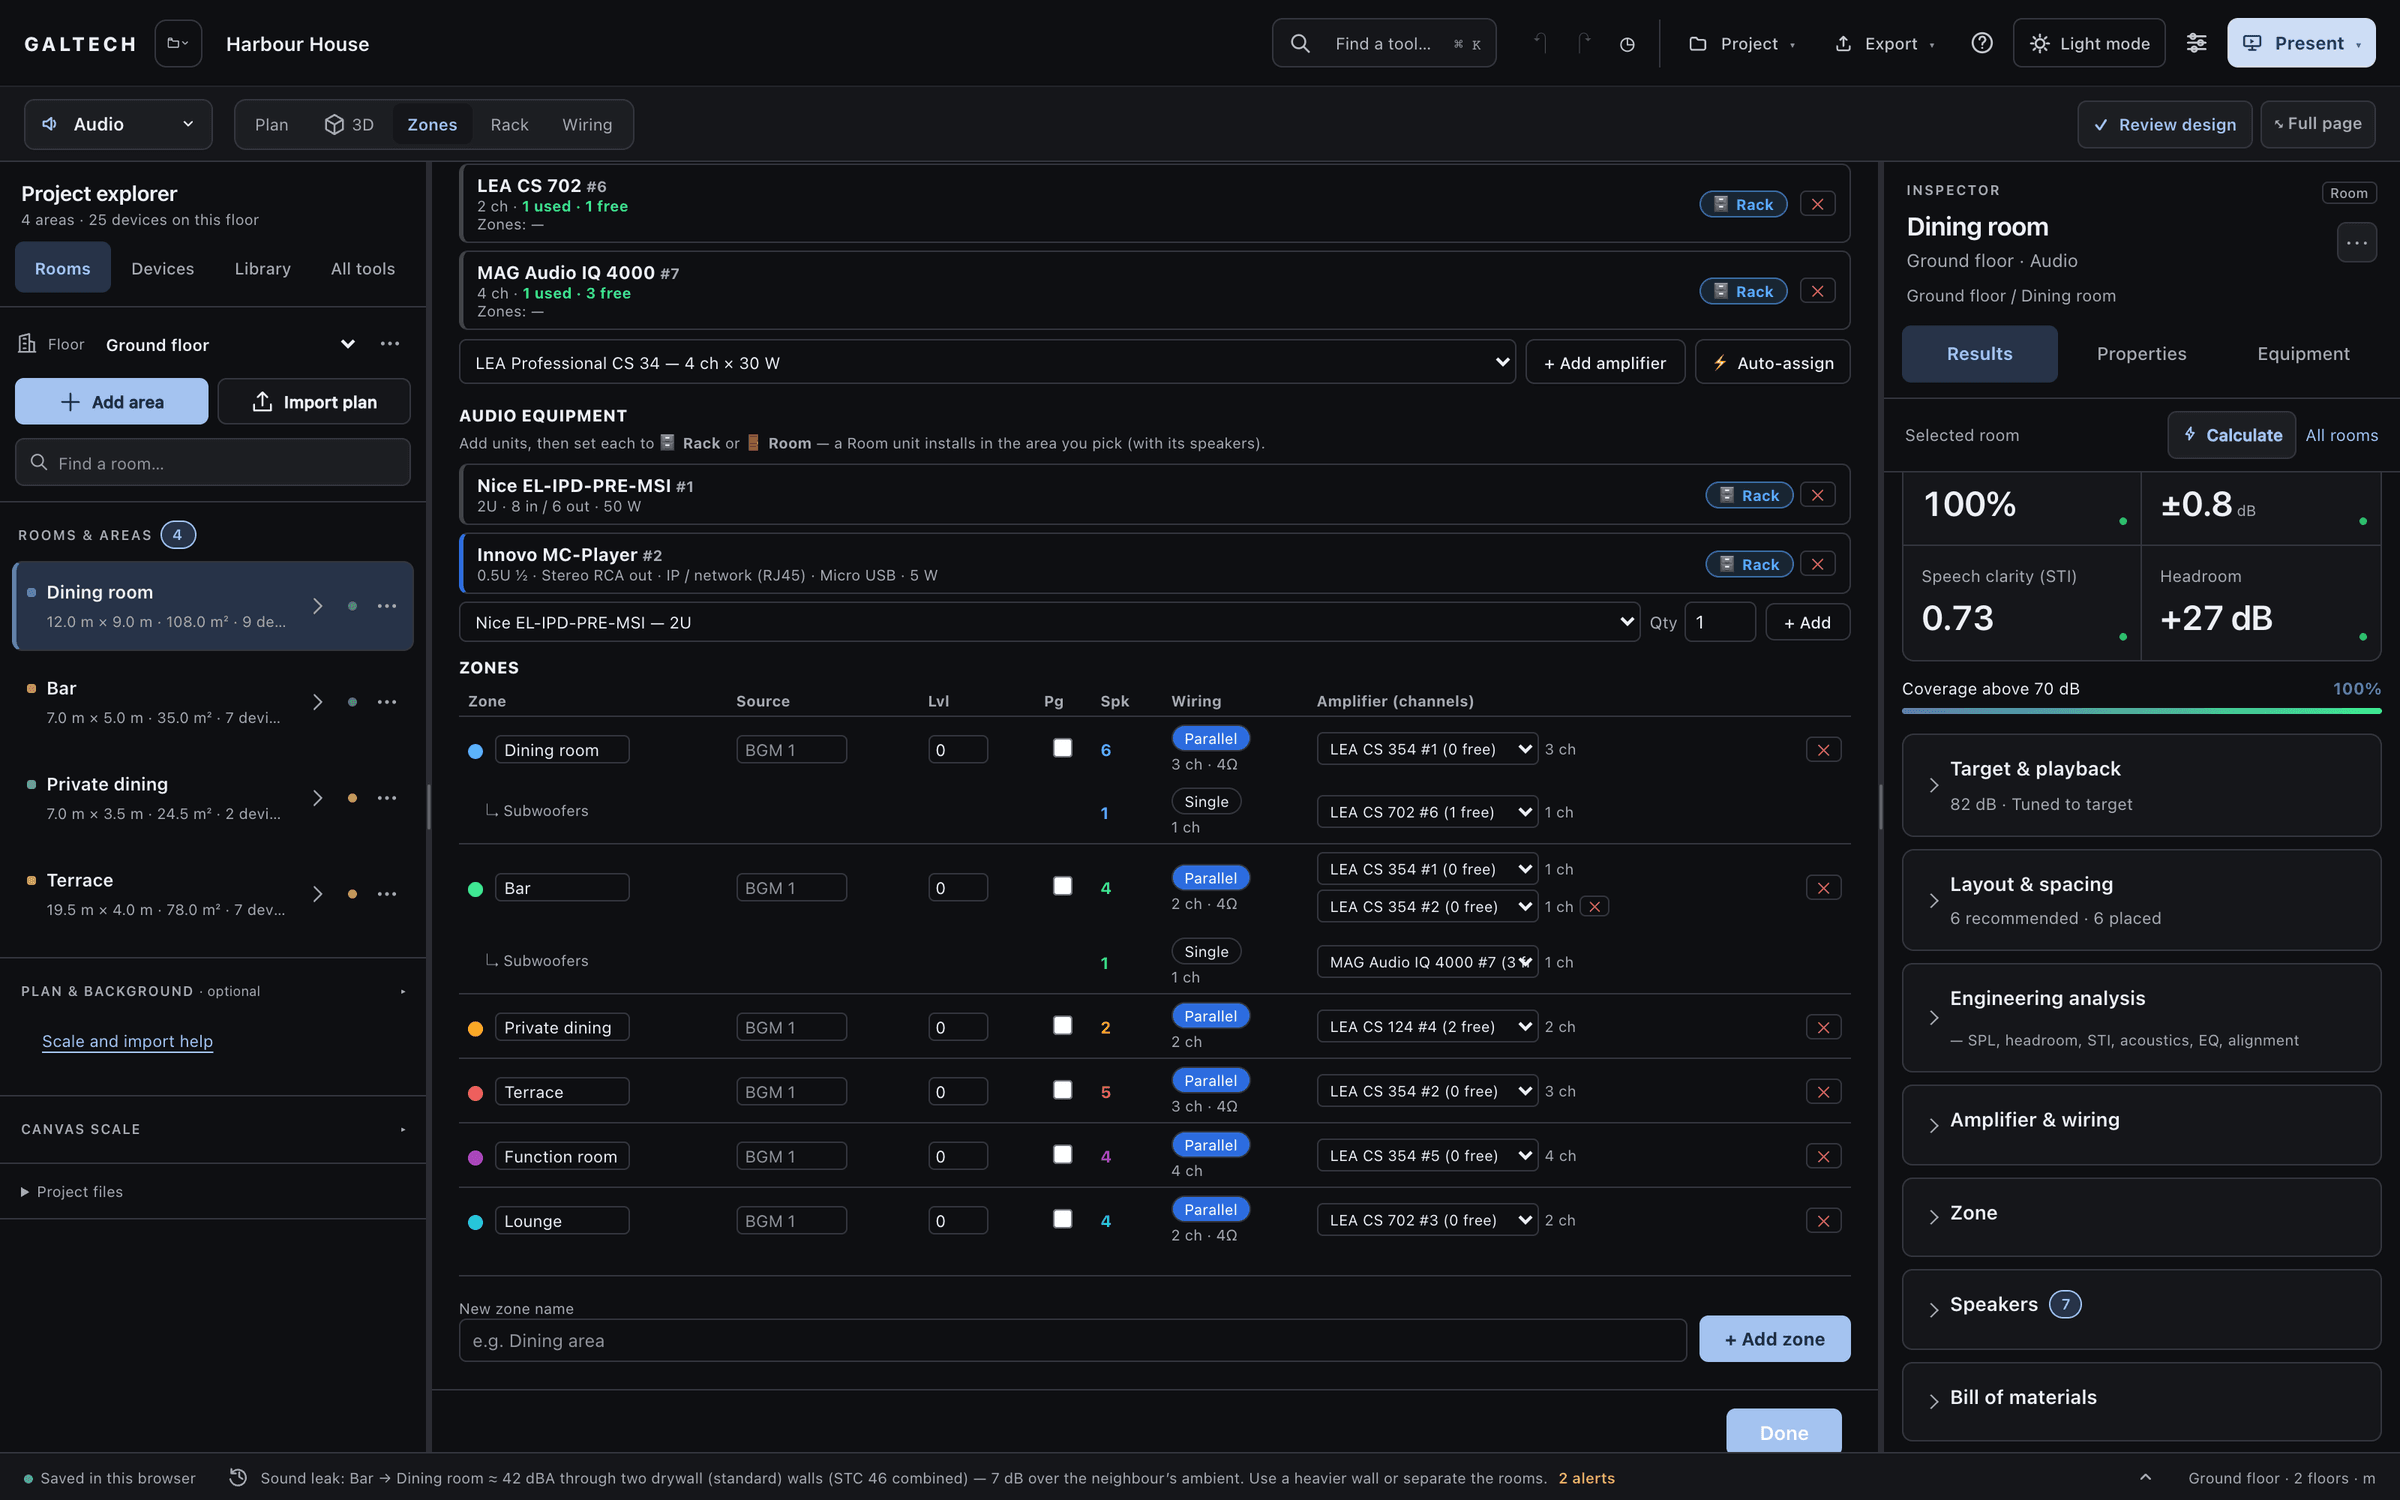
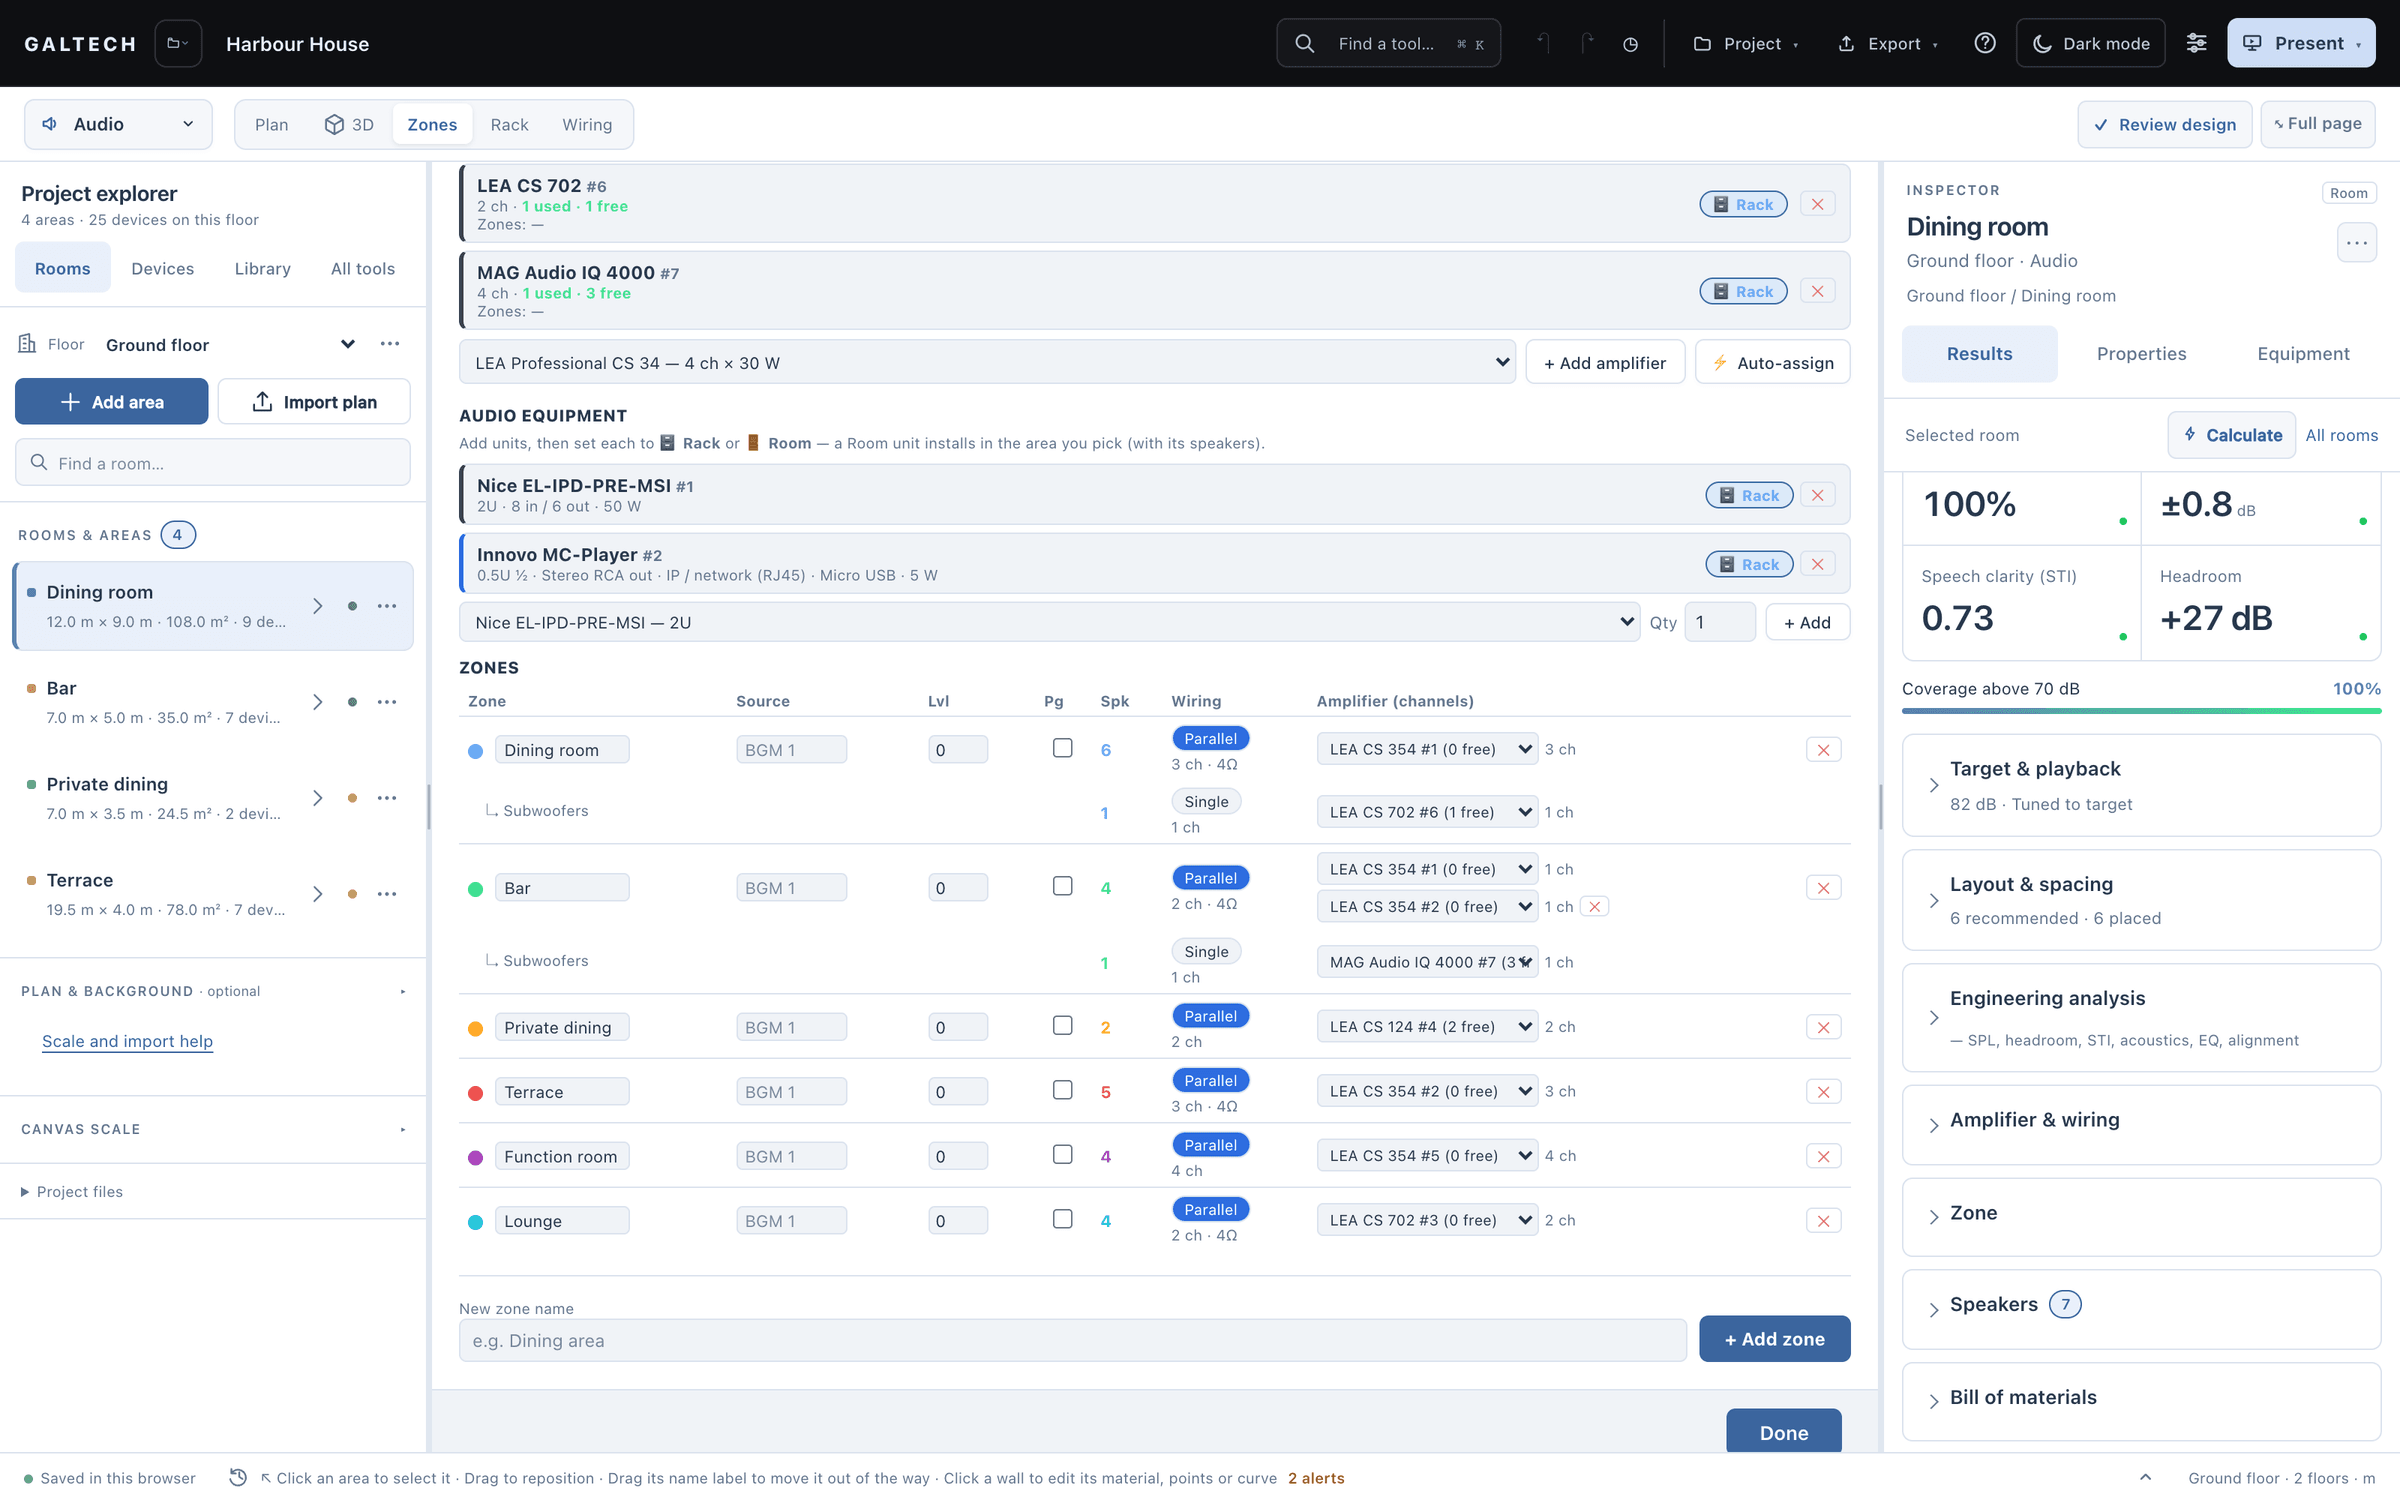
- Open Zones above the canvas. The amplifier units in the project are listed at the top.
- Add a unit from the amplifier library, or choose Auto-assign to create and assign amplifiers from the speakers you have placed.
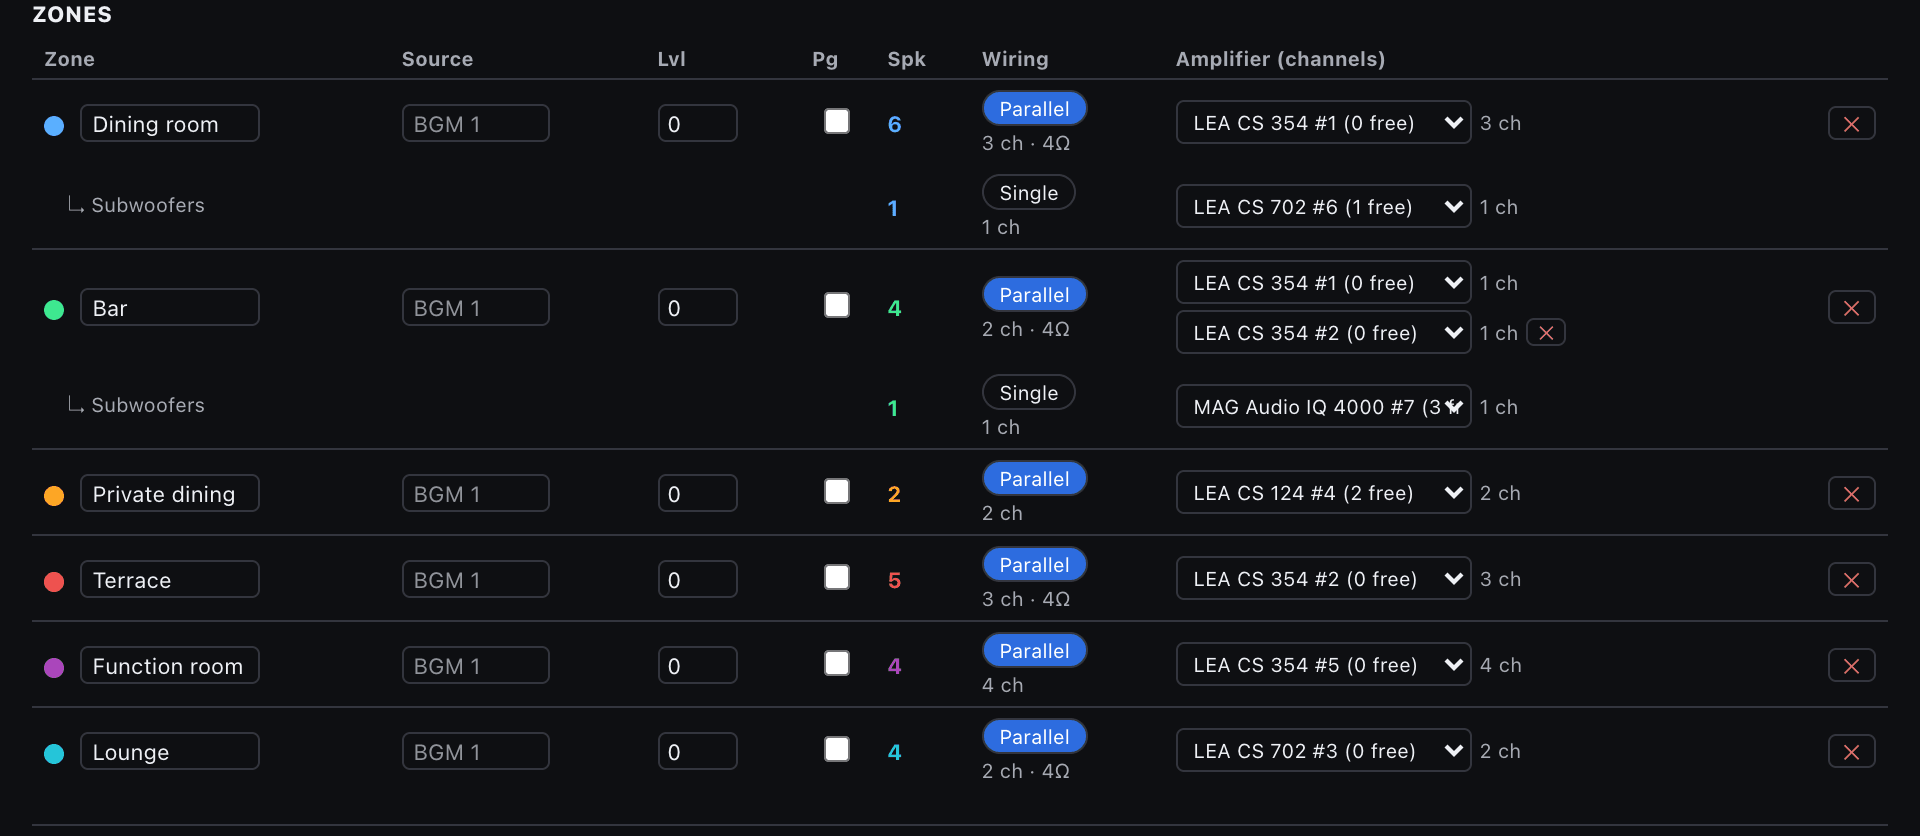
- For each zone, choose its source and its level.
- Choose the wiring: Single gives each speaker its own channel; Parallel puts two 8 Ω speakers on one 4 Ω channel.
- Assign the zone to amplifier channels. The last column shows how many channels each unit still has free.
Source and level
Each zone has a source and a level, in decibels. The level is a real offset: a zone run hotter or quieter shifts the predicted level, the headroom and the standards check of every speaker in it.
Custom zones
Add your own zone when areas should share a source, or for a space that is not a room, such as a corridor that shares speakers with the lobby.
- To move a whole area into a zone, choose the zone in the area’s ZONE selector.
- To move single speakers, Shift-select them on the plan and use Assign to Zone in the align panel.
Manual assignments override the automatic area zones. A coloured chip on each speaker shows its zone.
Paging
Flag a zone for paging when it must carry announcements. Zones, with their speaker counts, print in the client proposal.
Shared audio equipment
The same page handles the audio equipment the zones share: the matrix, the players and the processors, each with a quantity and an Add button. Each unit shows where it is installed; click it to switch between the rack and a room, because a player behind the bar is wired differently from one in the rack. Get this right here, and the rack and the wiring follow without extra work.
A zone can span more than one amplifier. Amplifiers, low impedance and 70/100 V lines covers channels, wiring modes and the level that follows the amplifier.