Systems
Design video distribution
List the sources and screens, let the tool size an HDBaseT matrix or AV over IP from the cable runs on your plan, then check HDCP, EDID, the rack and wiring.
On this page
Video is designed in a dialog rather than on the plan. Switch the discipline selector to Video, then open Library → Distribution design. You list the sources and the screens; the tool measures the cable runs on your plan and proposes the system, from Netvio parts.
Design it
- List the sources and displays. Add clearly named sources, such as an Apple TV, satellite, a Blu-ray player or a media server, each with a quantity and a location: in the rack or in a room. Choose the connections each source has, such as HDMI or optical. The Residential and Commercial presets fill in a typical set.
- Check the displays. The tool puts one display in each area. For each, choose the type, TV, LED screen or Projector, how many screens and the resolution. Untick an area that needs no display, such as an audio-only zone.
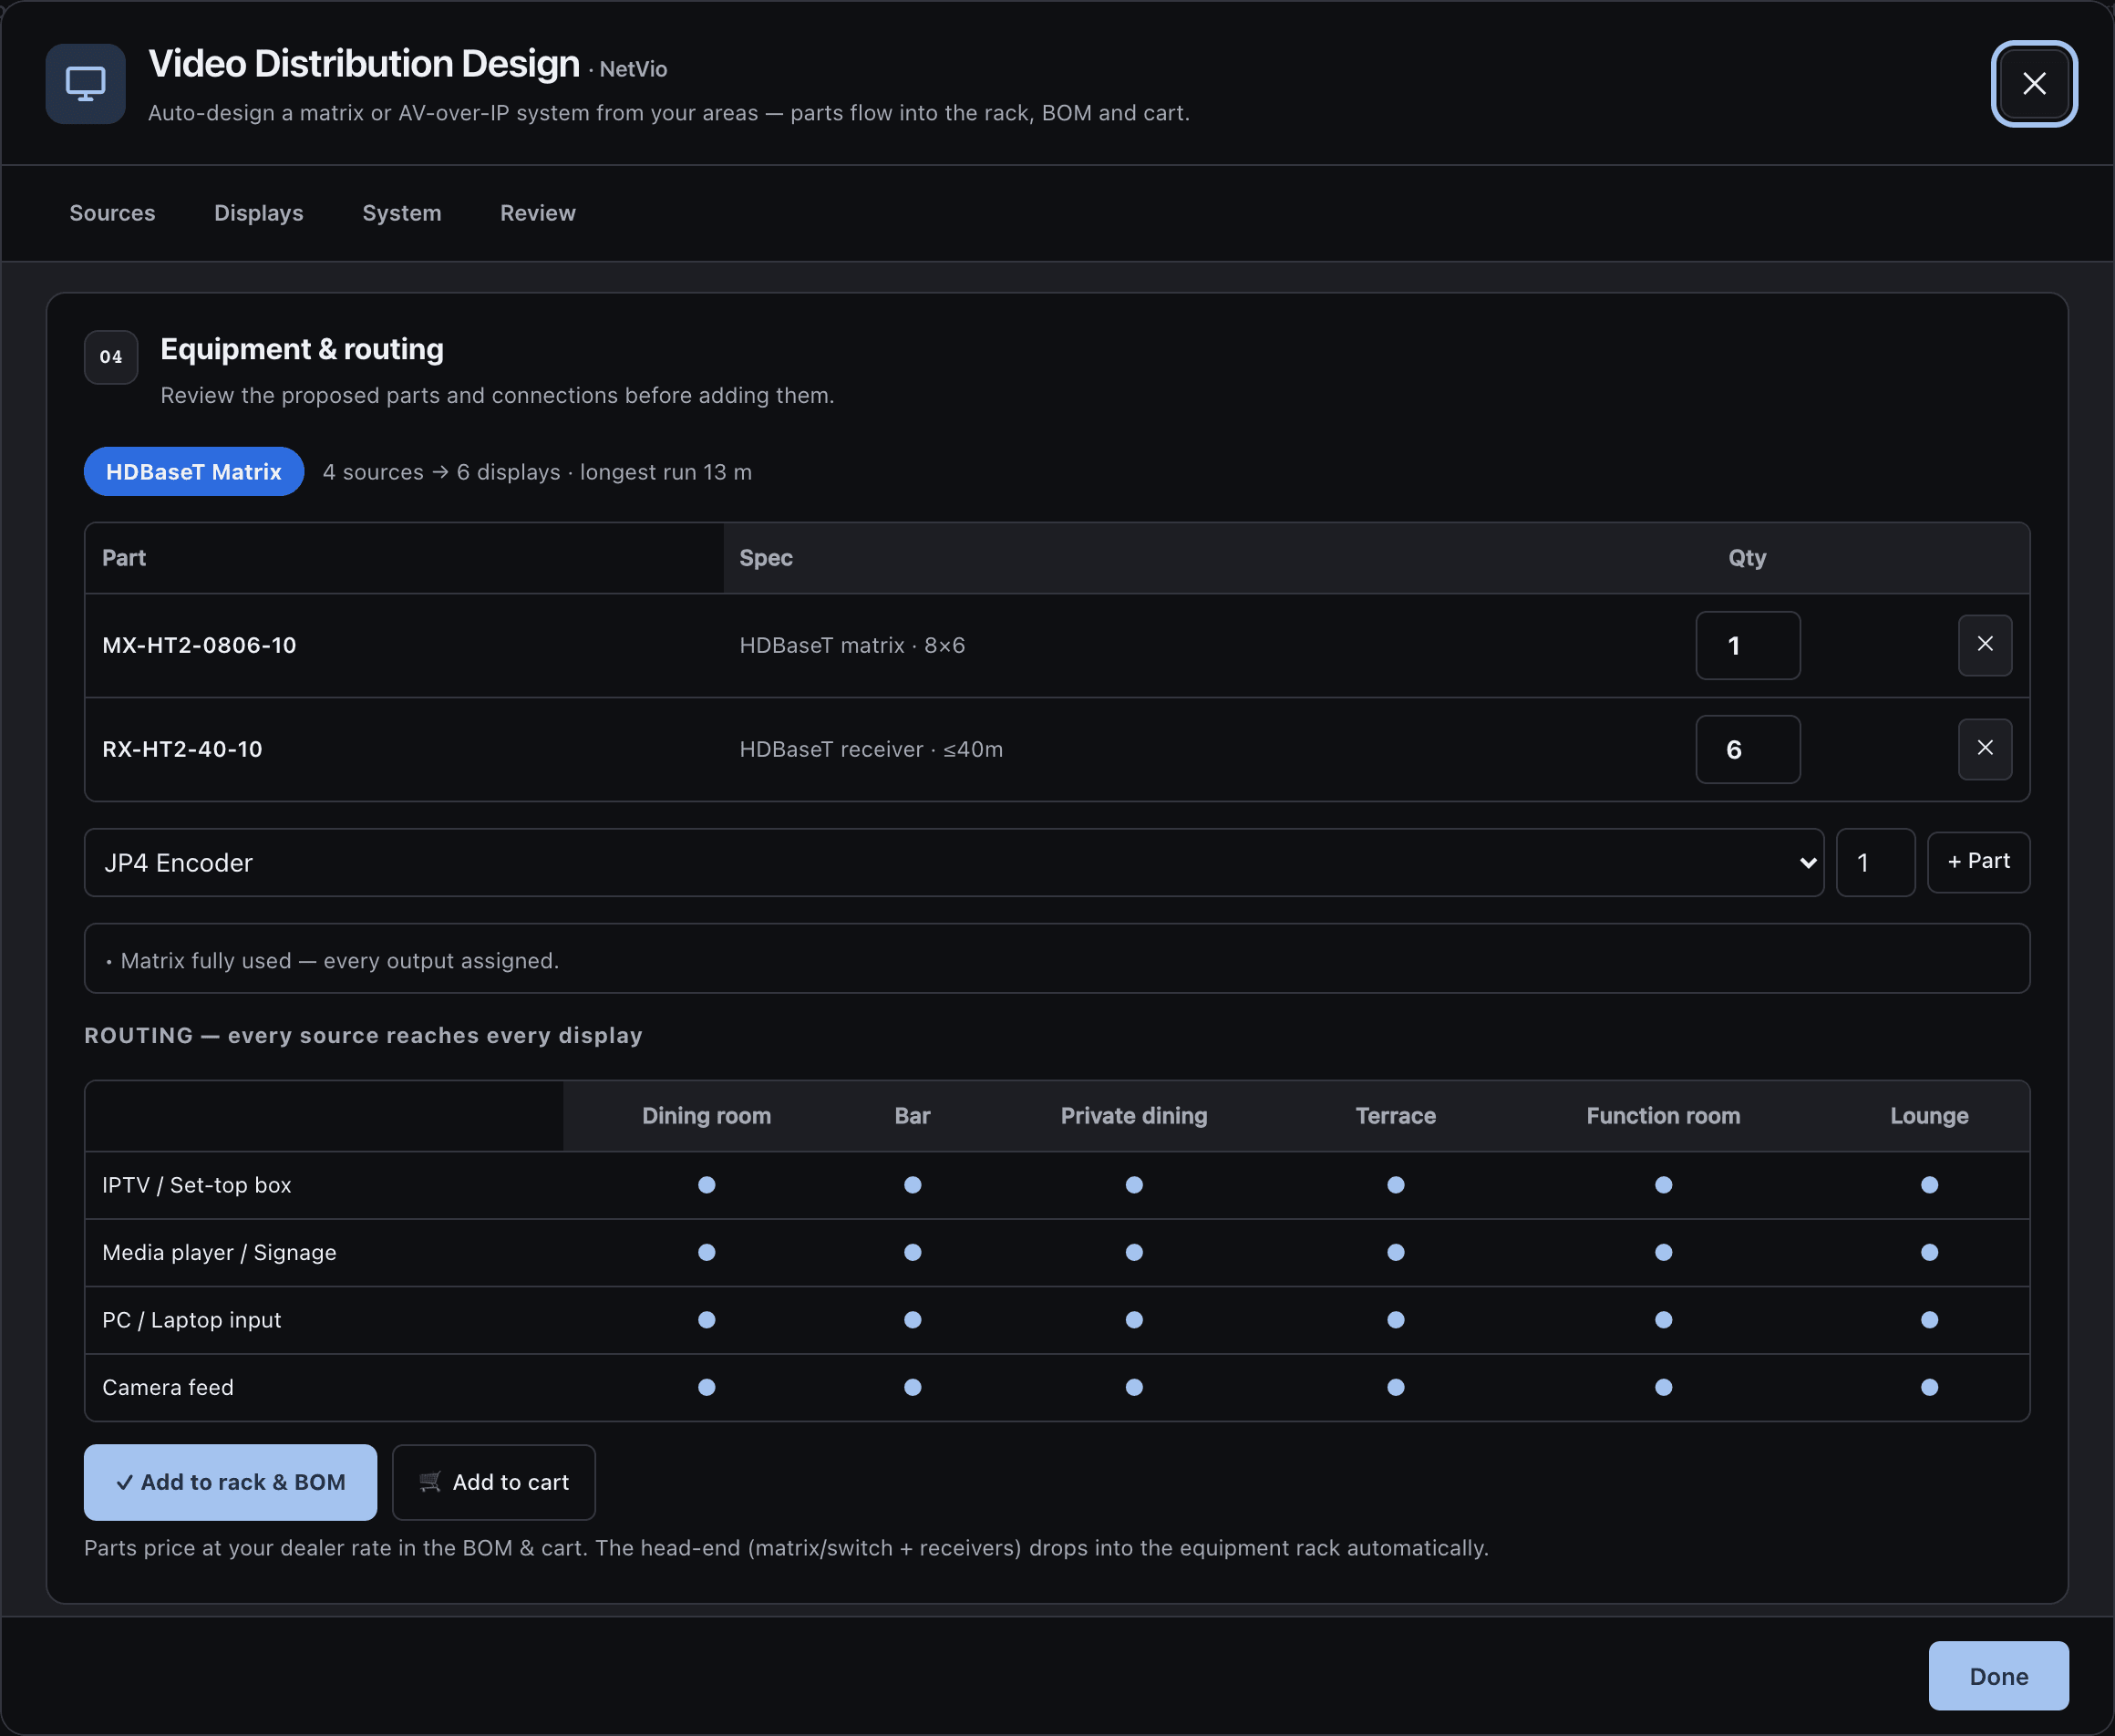
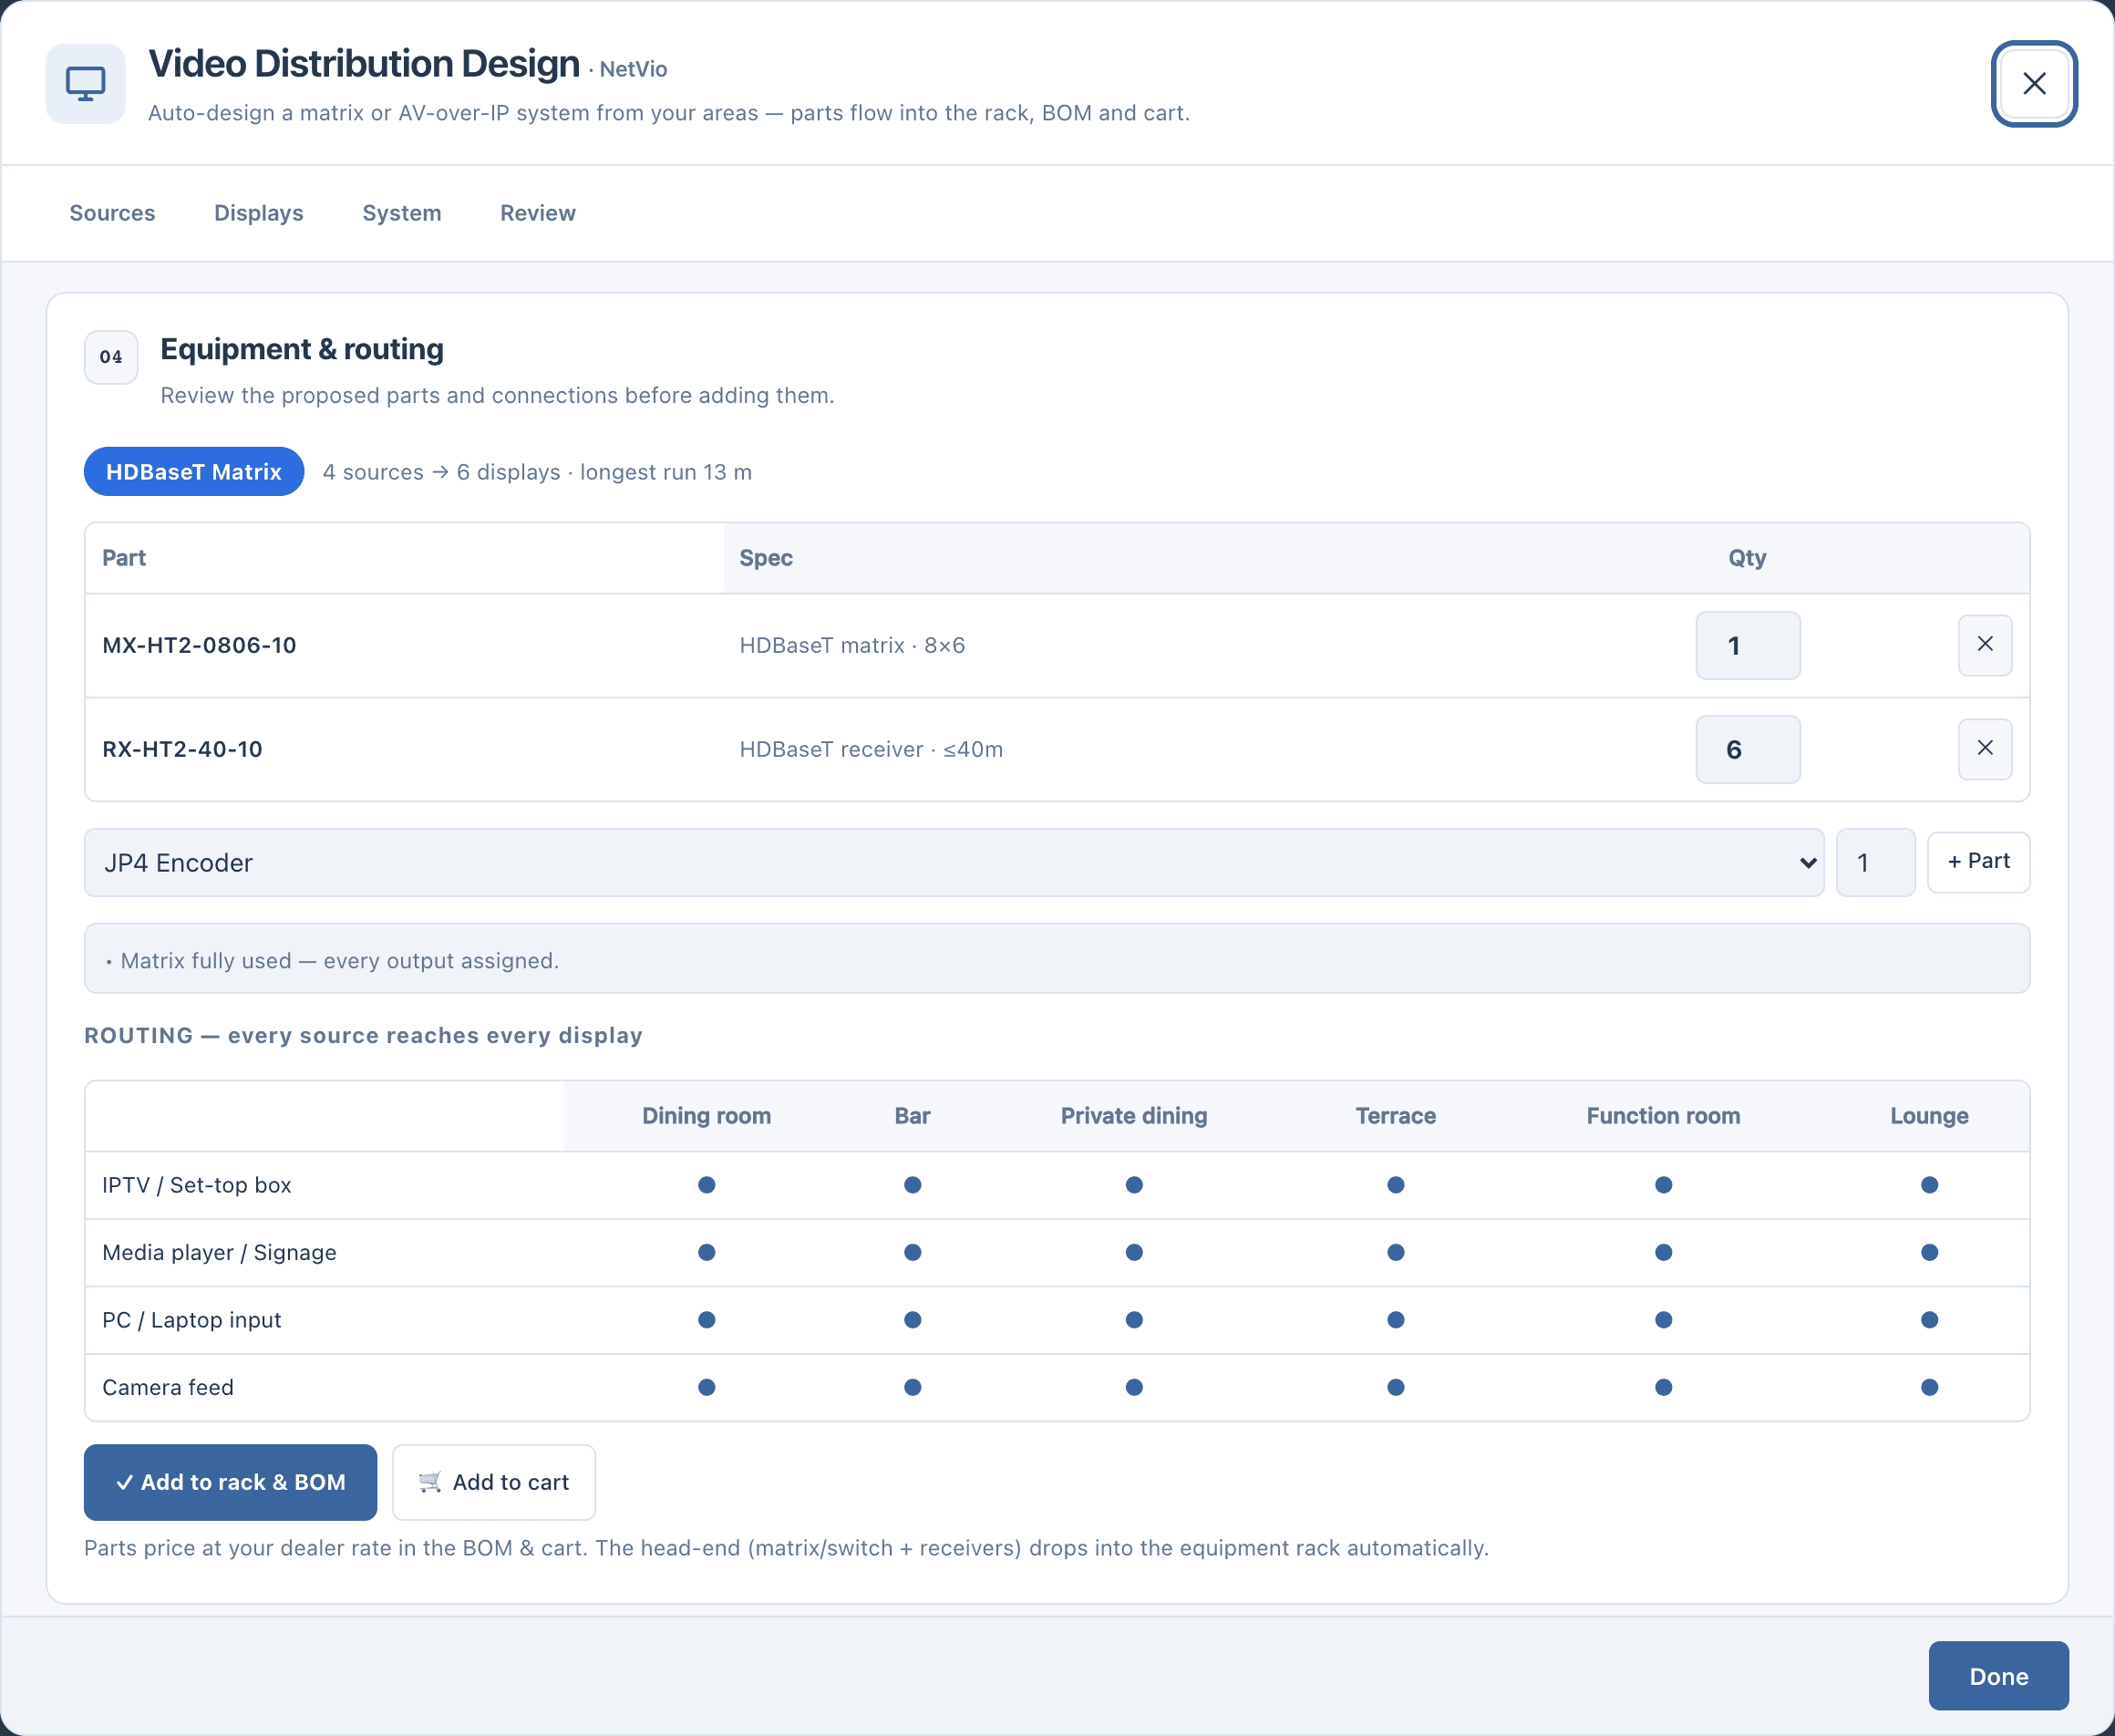
- Auto-design. Choose Auto-design distribution and inspect the proposed matrix or AV-over-IP equipment, scrolling through the parts and the room assignments.
- Check the shared system. Close the designer and review where the equipment sits in Zones, the cabinet in Rack and the connections in Wiring.
How auto-design chooses
The cable run to each screen is measured on your plan from the head-end: the rack area you choose, or a central point. Type a length on any display to override it.
- Matrix first. The tool picks the smallest HDBaseT matrix that fits, from 4 × 4 to 8 × 6 to 8 × 8, with a receiver at each display rated for 40 m or 70 m, by the measured run.
- AV over IP when a matrix cannot do it: more than eight sources or screens, or a run over 70 m. Then it uses an encoder per source, a decoder per screen, a controller and a PoE switch.
You get a routing matrix in which every source can reach every screen, and the exact parts. Add to rack & BOM puts the head-end in the rack; each receiver stays out of the rack, because it mounts behind its screen, but it still lists in the bill of materials. Dealers can add the parts to their cart at their dealer price. Run auto-design again at any time: it replaces the previous design.
HDCP and EDID
Both are set at commissioning, and both decide whether a picture appears at all.
HDCP protects premium content over HDMI. Every device in the path, the source, the matrix or encoder, the receiver or decoder and the screen, must support the same version, or the picture goes black. HDCP 1.4 covers up to 1080p; 4K premium content, such as UHD streaming and satellite, needs HDCP 2.2 or 2.3 from end to end. The tool’s help notes that the Netvio matrices, receivers and JP4 encoders and decoders in the catalogue support HDCP 2.2 and 2.3.
EDID is the capability report a screen sends back, so the source picks a signal it can show. With many screens on one system, a 4K source can be forced down to 1080p, or lose its surround sound, and you get black frames when switching. EDID management presents one managed EDID to each source: a copy of a chosen display, a fixed profile such as 4K60 with stereo, or a custom one. Set it to the lowest common capability of the screens that source feeds.
Tip
In a sports bar with twelve screens, set every encoder to a fixed 1080p60 stereo profile. Every switch is then instant, with no black frames.
On the wiring diagram
Build from project in the Wiring view draws the video system end to end: every source, the matrix, a receiver behind each screen and the screens, or source, encoder, switch, decoder and screen over IP. The connection schedule gives the installer the full HDMI and Cat6 path to every screen. See Read and export the wiring.
Clear and start again
Clear all removes the sources, the displays and the designed head-end, from the rack, the bill of materials and the wiring as well; the areas stay. If areas were renamed or deleted after you designed the video, the designer says so at the top: design again, or clear it.
The video report
Video has its own branded report: the architecture, the device schedule and the connections. Choose it in Export → Prepare reports. A display’s type carries through to the display and cable schedule, the report and the wiring, so the installer can tell a projector from a TV.
Note
Keep the source, the destination and the cable type clear for every link, and confirm supported formats against the equipment’s own specifications.