Getting started
Find your way around the workspace
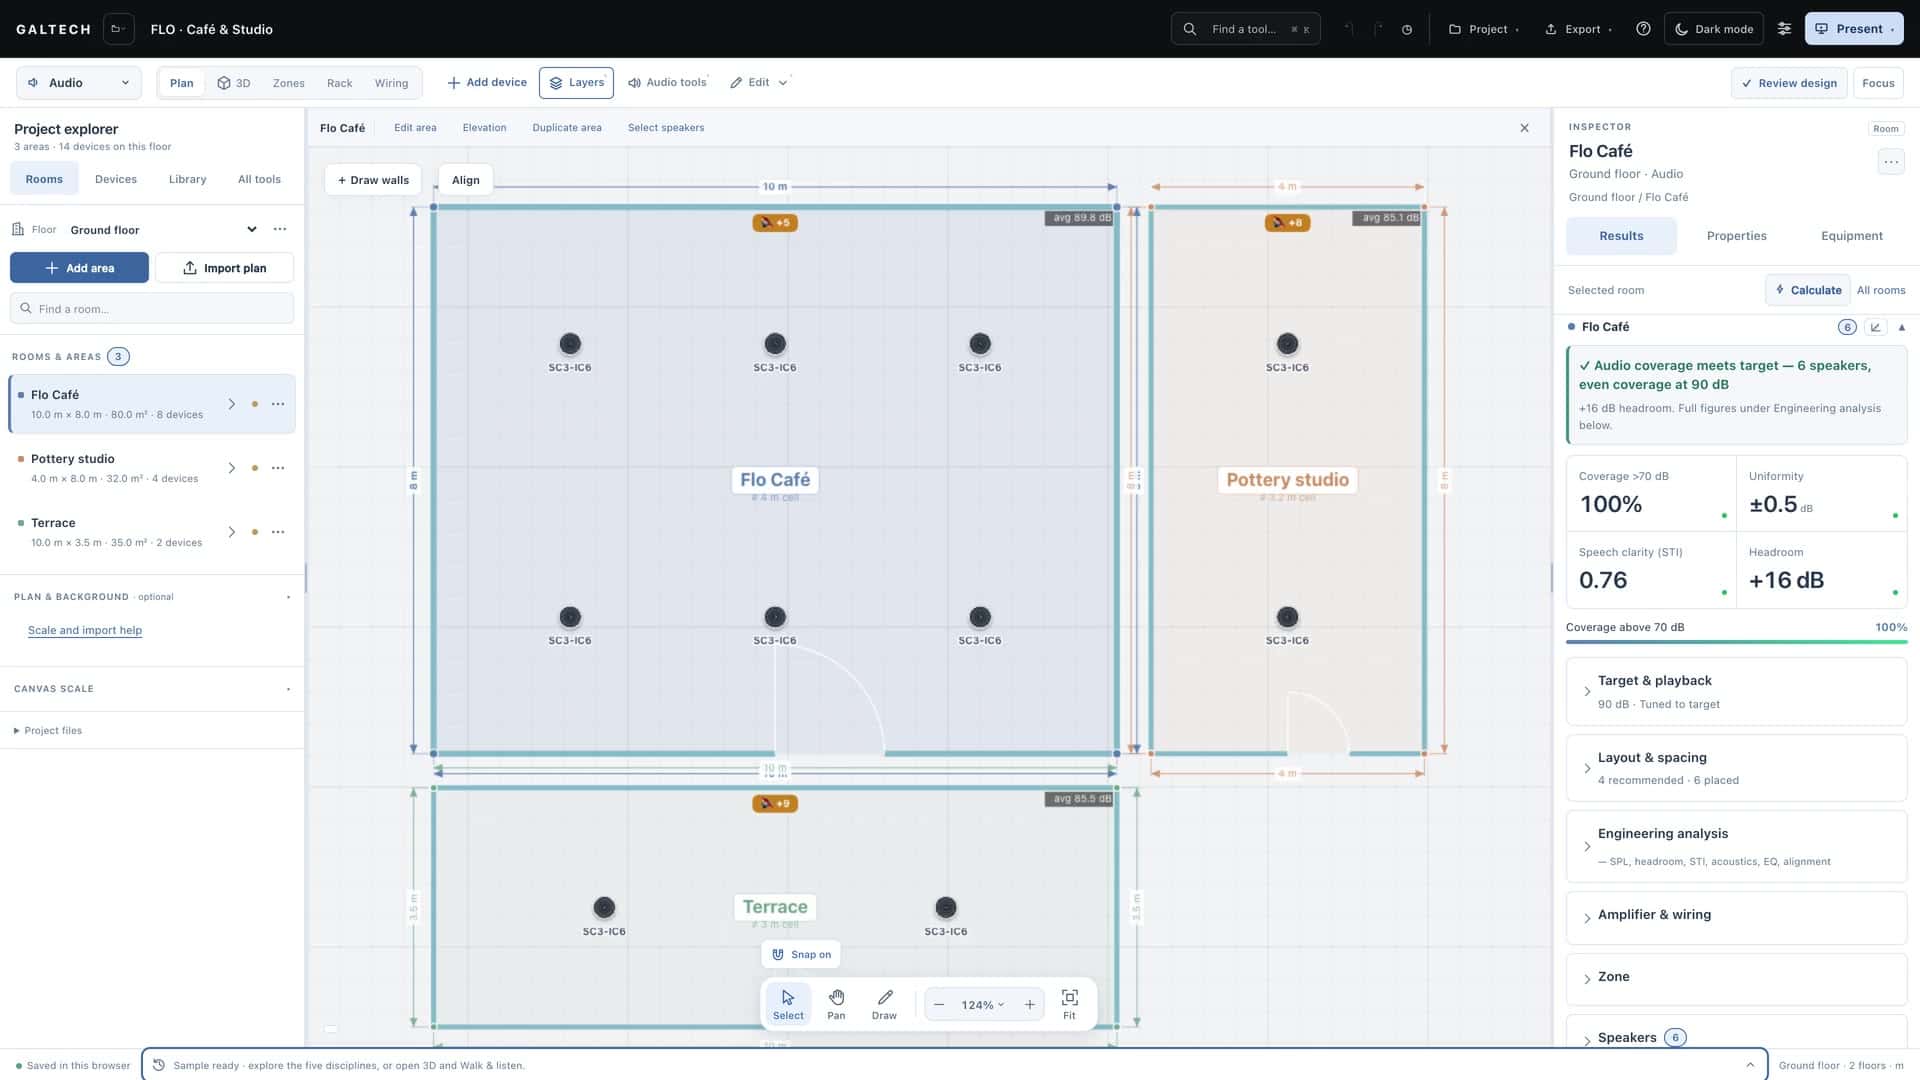
What each part of the workspace is for: the discipline selector, the view tabs, the Project explorer, the canvas dock, the Inspector and the top bar.
On this page
One project, five disciplines and one shared workspace. Once you know its six parts, every task in these docs starts from a place you can find.
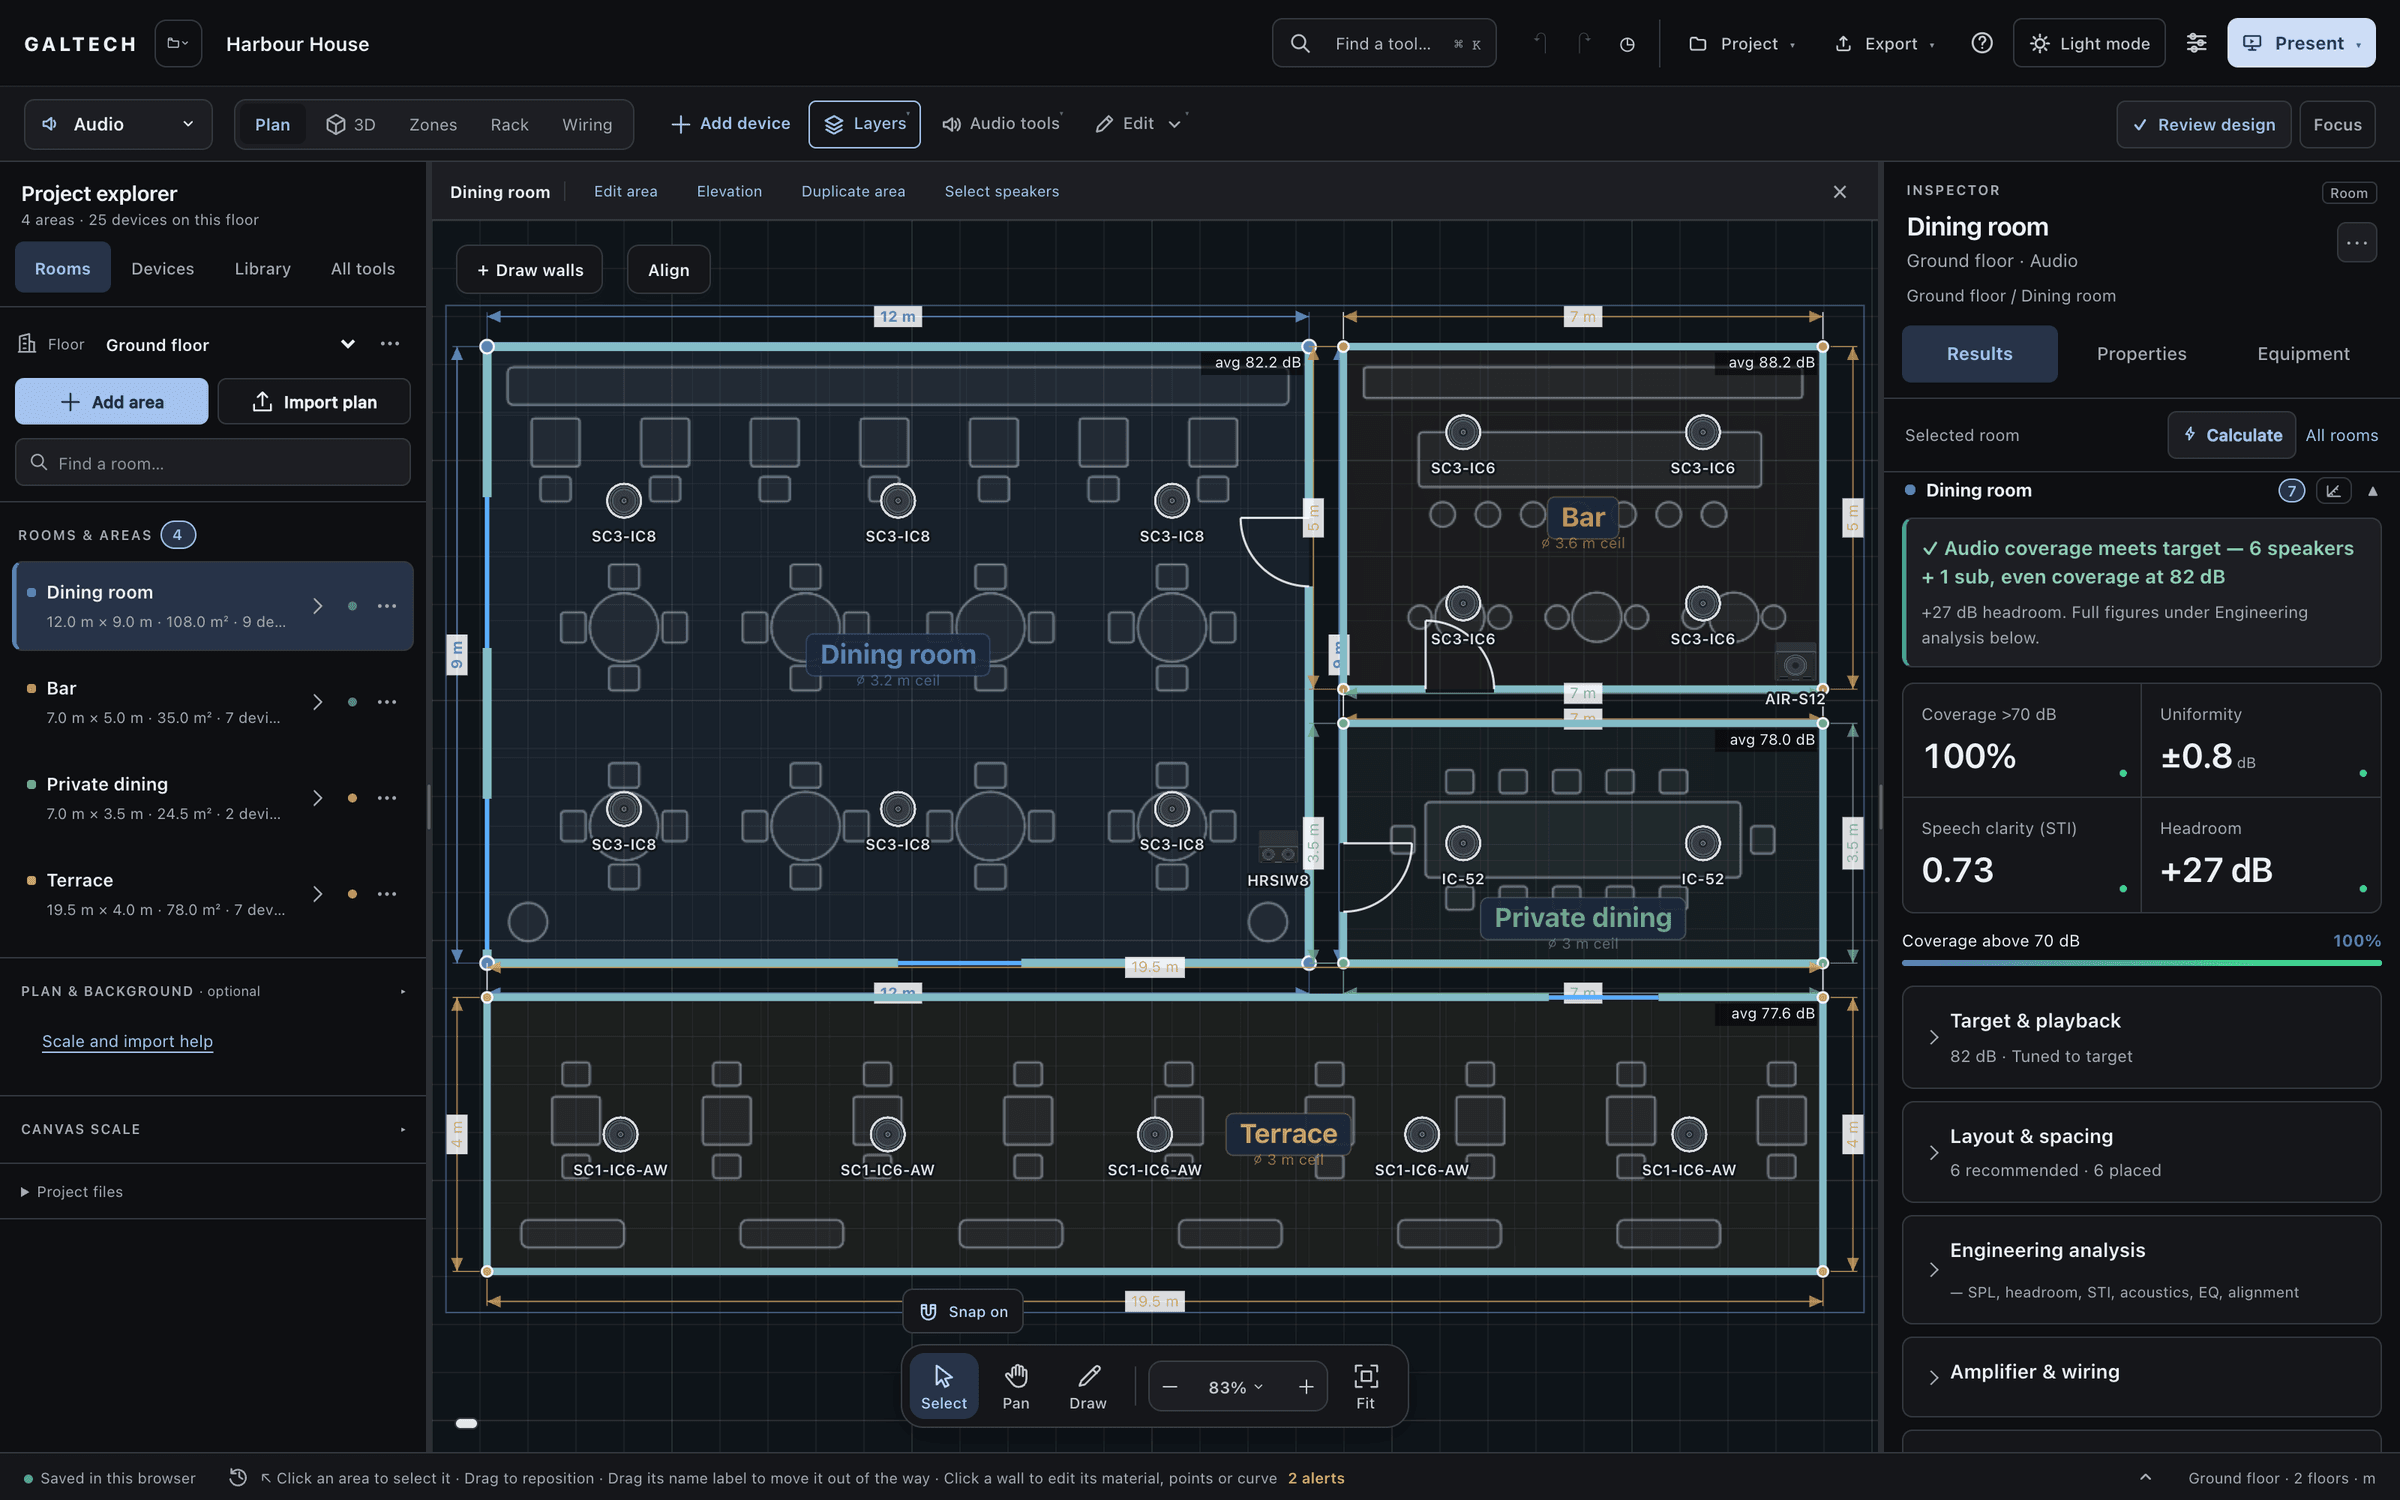
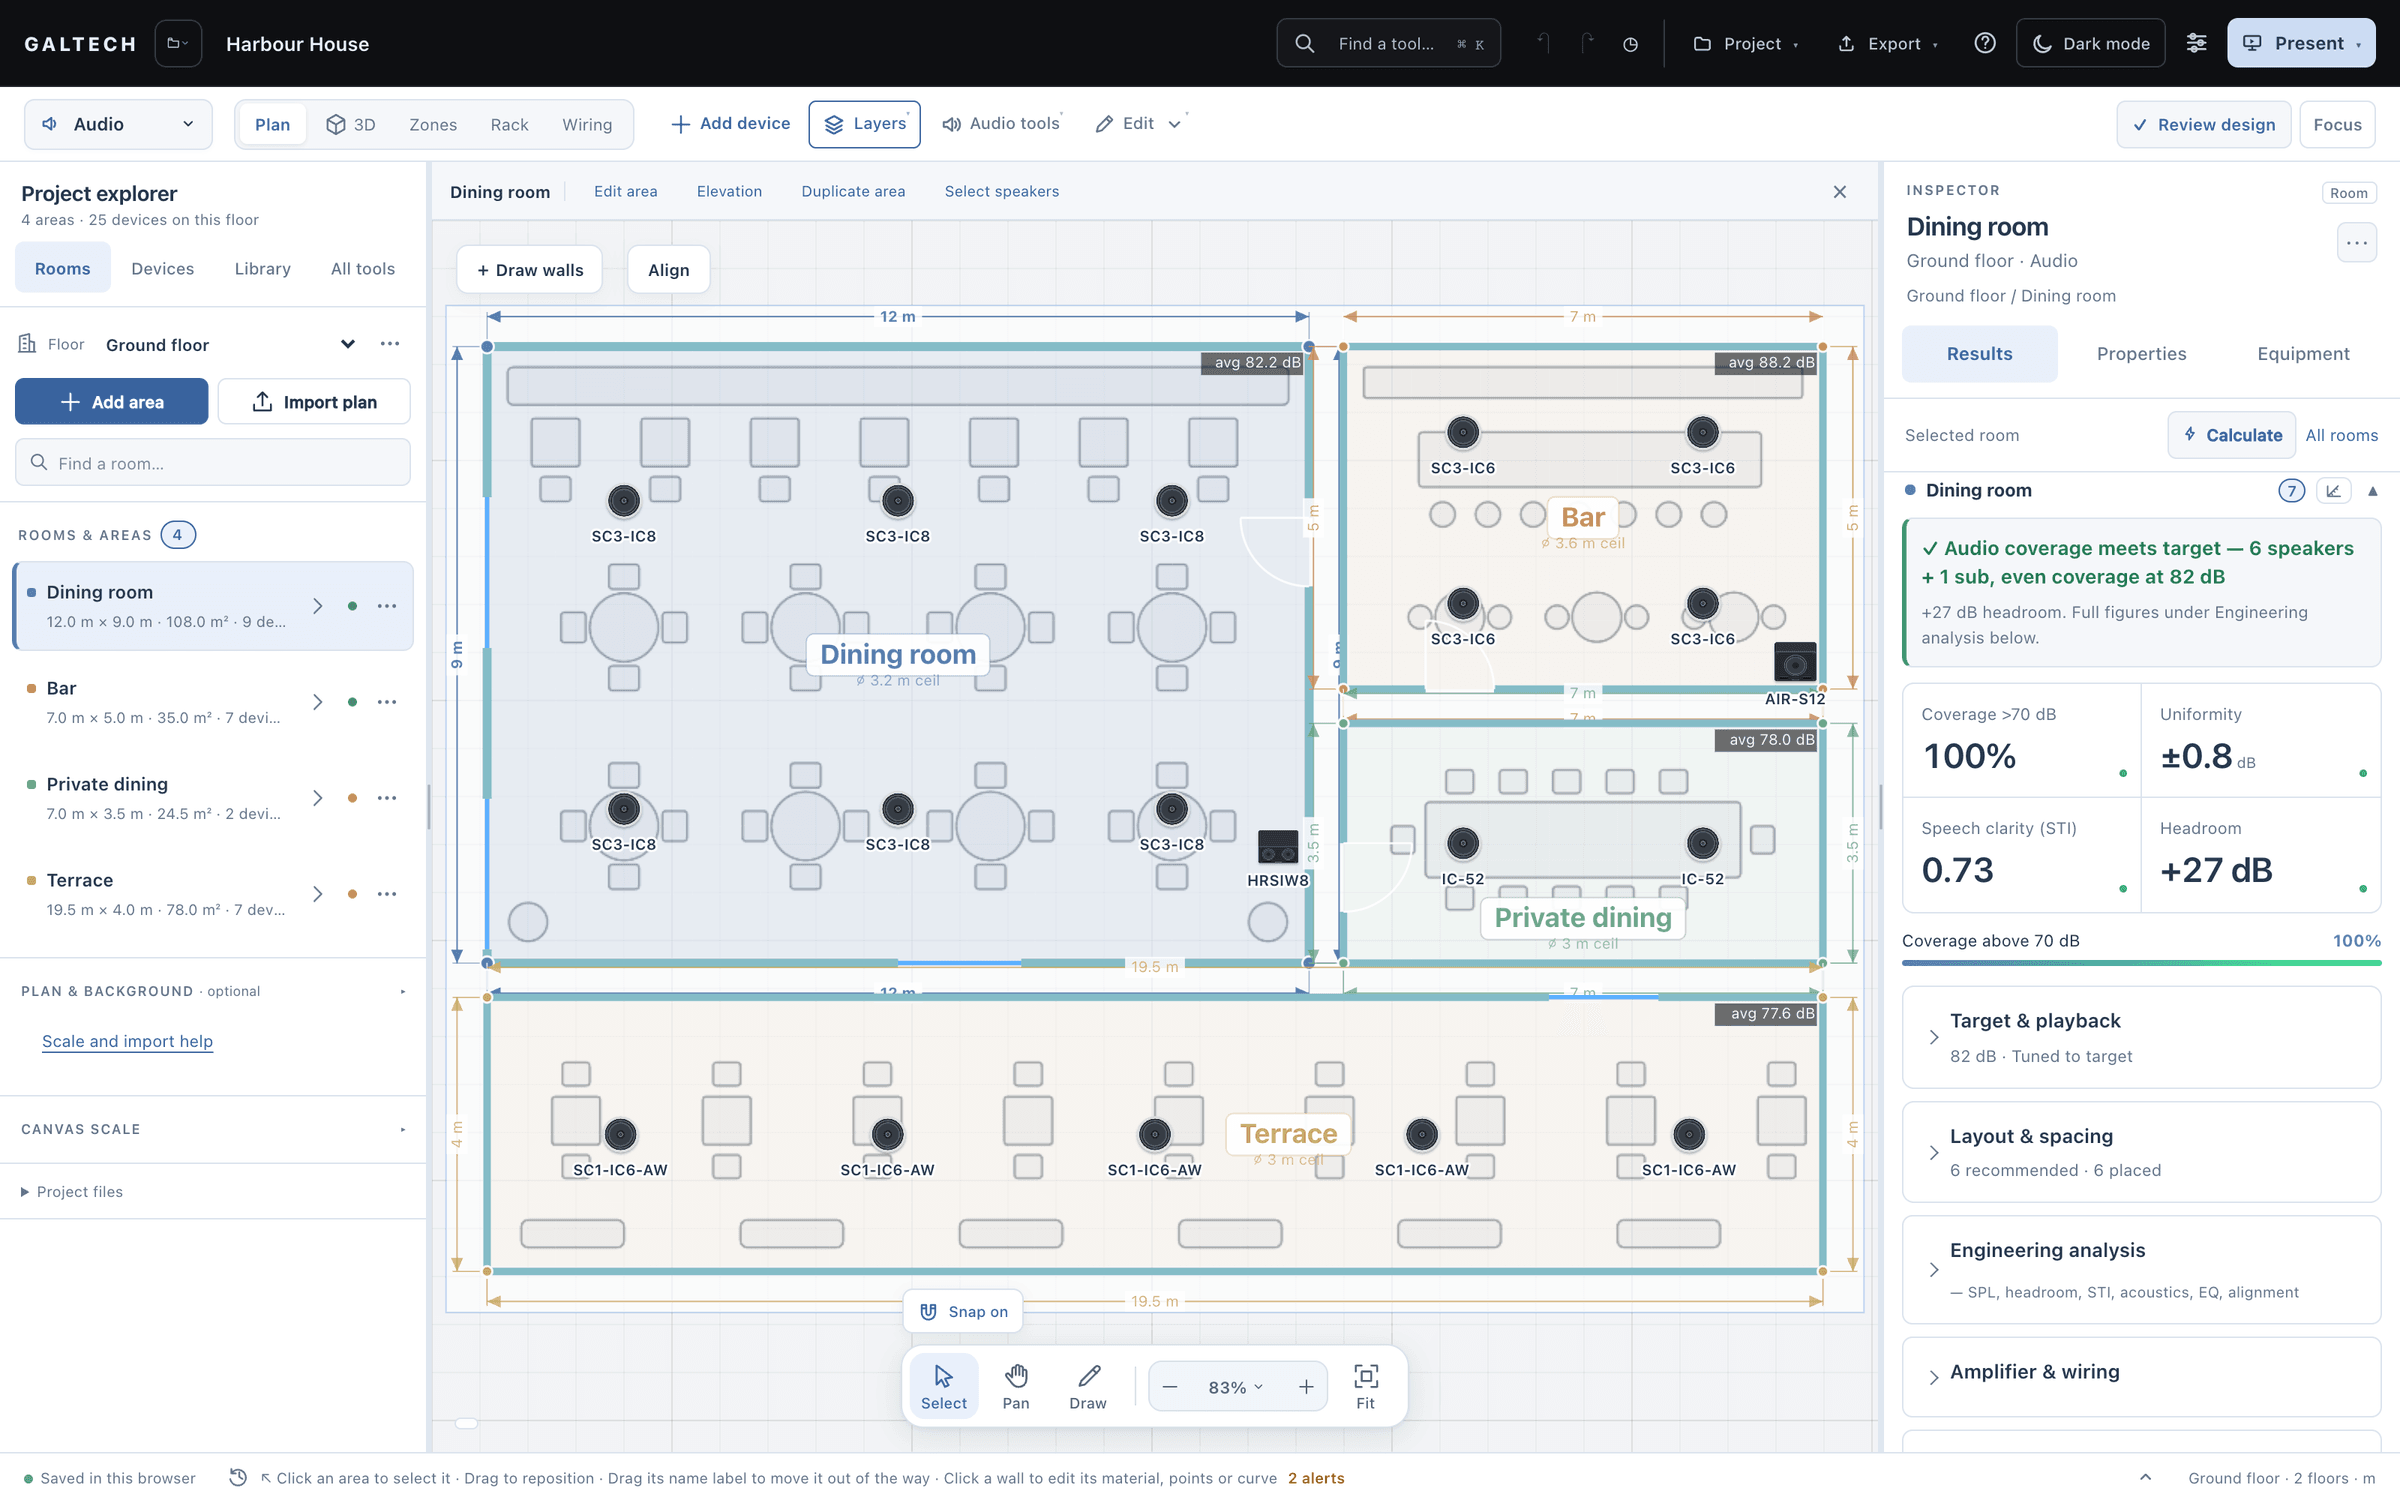
The six parts
- The top bar. The project name, search, undo and redo, the visual history, the Project and Export menus, Help, the theme, settings and Present.
- The discipline selector and the view tabs. Choose Audio, Network, CCTV, Video or Automation, then Plan, 3D, Zones, Rack or Wiring. The discipline’s own tools sit beside them, with Review design and Focus at the right.
- The Project explorer, on the left: floors, areas, devices, the product library and every tool.
- The canvas, in the middle, with Draw walls and Align above the plan and the dock below it.
- The Inspector, on the right: the results, the properties of what you selected, and the equipment list.
- The status bar, at the bottom: whether your work is saved, hints for the tool in use, the active floor and the units.
Choose a discipline and a view
- Open the discipline selector at the top left and choose Audio, Network, CCTV, Video or Automation. The rooms and the floor plan stay the same; the tools, the layers and the results change to match.
- Choose a view above the canvas. Plan is the drawing. 3D builds the rooms from your walls, with every device at its mounting height. Zones organises the audio equipment, Rack is the equipment rack and Wiring is the connection drawing.
- Keep the canvas comfortable: Select to edit, Pan to move the view, Fit to see the whole drawing.
Note
Changing the discipline or the view never moves a device. Looking at the design in 3D is safe; only an edit changes where something is installed.
The Project explorer
The left column is where you will spend most of your time. It has four tabs:
- Rooms lists the areas on the current floor, each with its size and device count. The floor selector, Add area and Import plan sit above the list.
- Devices lists every device on the floor, grouped by area, so you can find speaker four in the café without hunting for it on the plan. Click a device to jump to it.
- Library is the product catalogue: search by model, brand or type, filter by manufacturer and device type, then Place or Details.
- All tools lists every command in the tool, organised by task, from project details to commissioning and readiness checks.
The Inspector
The right column follows your selection.
- Results shows the verdict, the scorecard and the engineering analysis for the selected area. Results update as you design; Calculate forces a full recalculation, for the selected room or for all of them.
- Properties edits what you selected: a speaker, an access point or a camera, with its position, mounting and aim.
- Equipment lists what the selected area needs, or the Whole project, including the rack, and exports it as a CSV file.
The canvas dock
The dock floats at the bottom of the plan, and you will use it constantly.
| Control | What it does |
|---|---|
| Select | Choose and move things. The normal tool. |
| Pan | Move the view. You can also hold Space and drag. |
| Draw | The drawing tools: areas, walls, doors, people, set scale and more. |
| Zoom | Zoom out and in, or pick a zoom level. The scroll wheel zooms too. |
| Fit | Bring the whole design back into view. If you lose the plan in a corner, Fit is the way home. |
Just above the dock is the snapping toggle. With snapping on, a speaker you drag lines up with the others and shows the distances as you go. Hold Alt while dragging to place something freely for a moment.
Focus and Present
Focus hides both side columns so the plan fills the window: useful on a small laptop, or when the client is looking at your screen. Press it again, or press Esc, to bring the columns back. Present, in the top bar, opens the client presentation, the walk-in and the 3D tools.
Find any tool
Press CtrlK, or ⌘K on a Mac, or click the search box in the top bar. The command palette finds any tool by name: type “3d” and it lists the 3D view, the 3D presentation, the walk-in and the 3D exports.
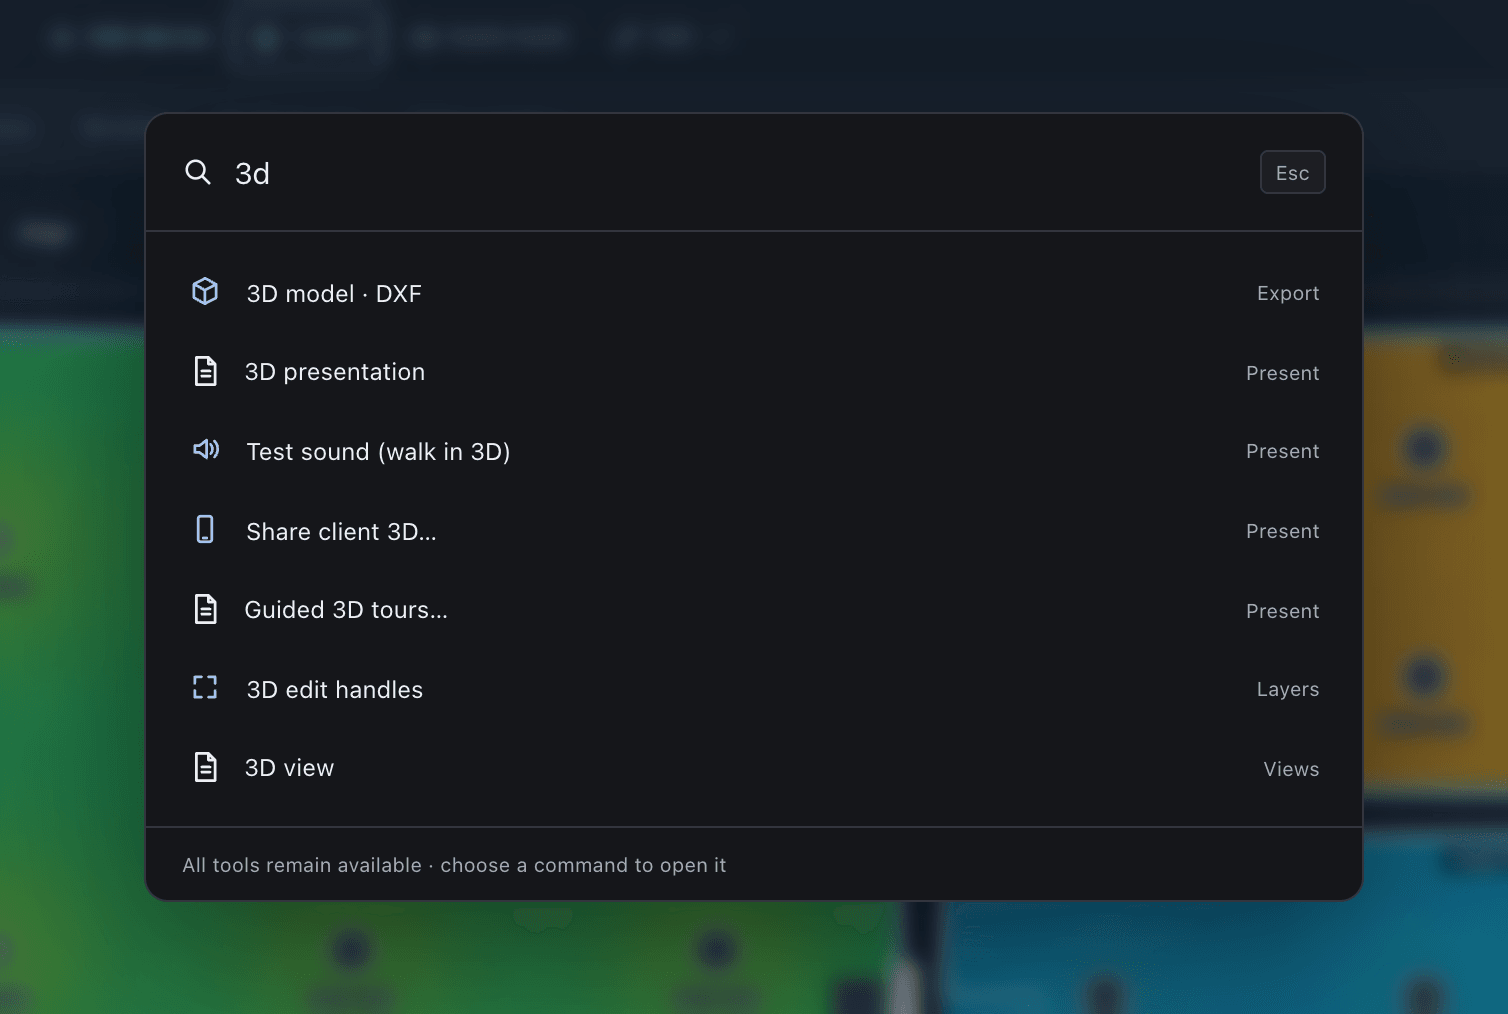
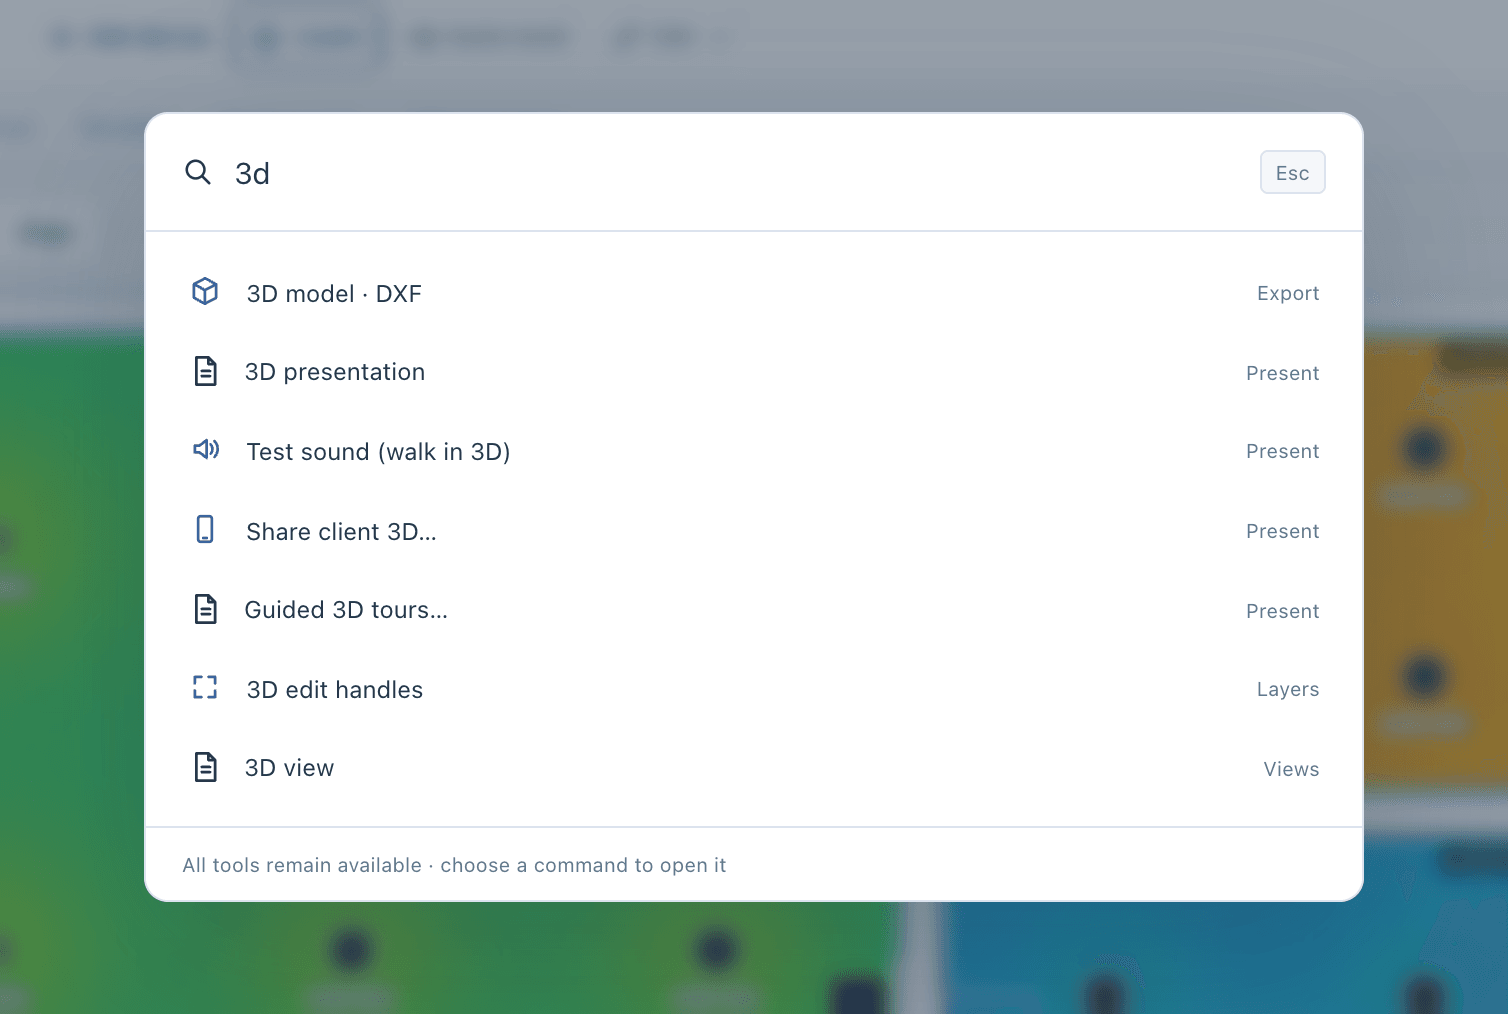
The All tools tab of the Project explorer holds the same commands, grouped by task, if you would rather browse.
Before you present: Review design
Review design, at the top right, runs a checklist across the whole project. It counts what needs attention, what is advisory and what has passed, and most open checks have a button that takes you straight to the fix. Run it before every export.
The top bar, at a glance
- The clock icon opens the visual history: thumbnails of your recent edits that you can preview and restore. See Save, back up and reopen projects.
- Help opens the Learning Centre, with the narrated lessons and the task guides. See Use the Learning Centre.
- The theme button switches between the light and dark themes.
- Settings holds the text size, the version you are running and its release notes.